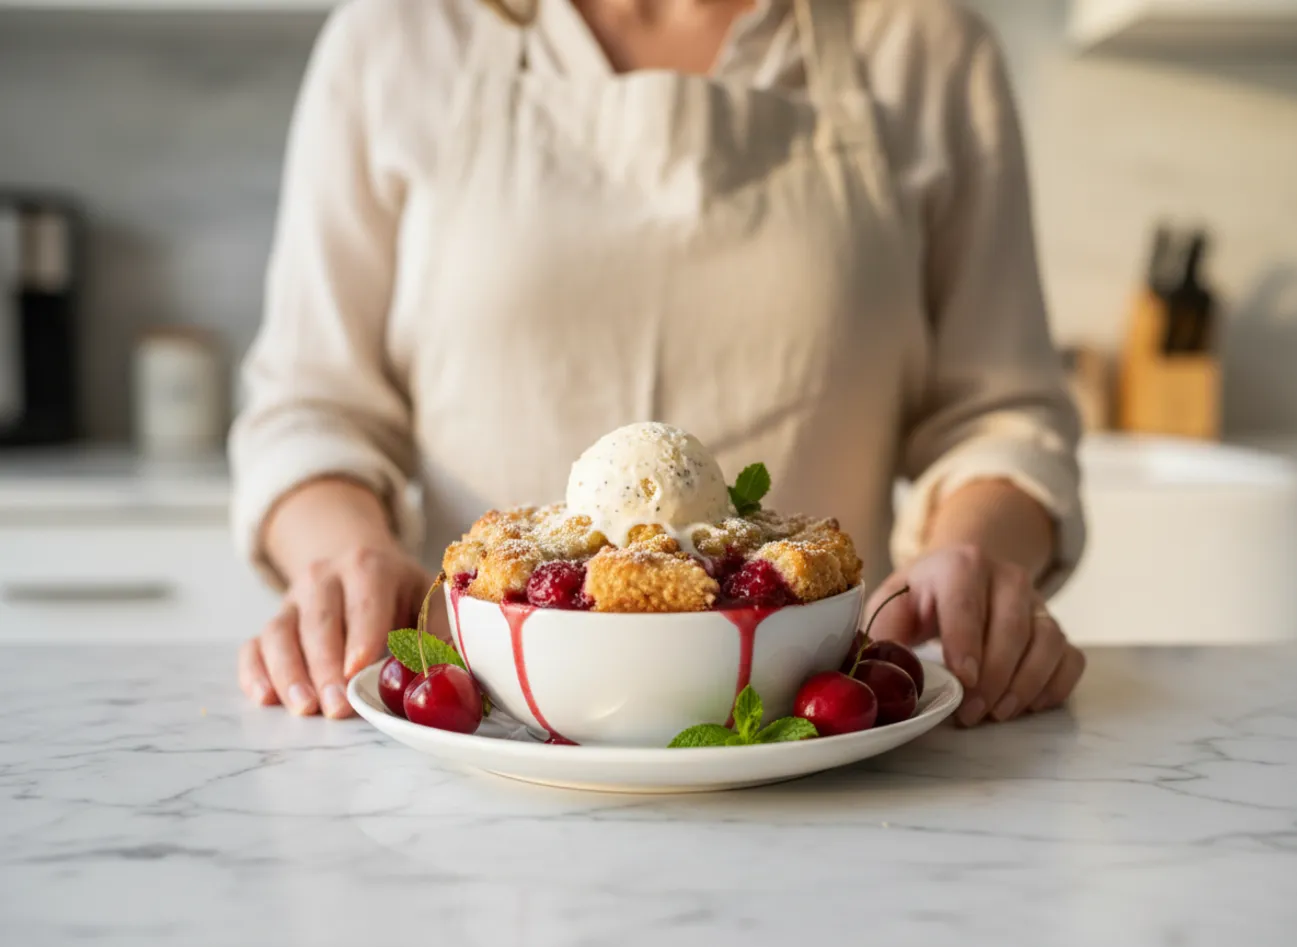
Summer, for me, has always tasted like sweet cherries. I remember sitting on my grandma’s porch, a bowl of deep red cherries in my lap, spitting the pits into the garden. The best days ended with her bringing a bubbling, golden-brown dish out of the oven. The aroma of baked fruit and warm biscuits filled the entire house. That dish was her famous Sweet Cherry Cobbler Recipe, a dessert so simple yet so incredibly satisfying. It’s more than just a recipe; it’s a memory baked into a dish. This version is my tribute to hers, made with just five ingredients so you can create those same warm memories without spending all day in the kitchen. It’s the perfect end to a family barbecue or a quiet evening. When the weather gets too hot to turn on the oven, I sometimes switch to other simple sweets like my favorite no-bake desserts, but nothing truly replaces the classic comfort of this cobbler.
Why You’ll Love This Sweet Cherry Cobbler Recipe
This dessert is a celebration of simplicity. You don’t need a long list of fancy ingredients or complicated techniques to produce a truly spectacular dessert. The beauty of this Sweet Cherry Cobbler Recipe lies in its rustic charm and straightforward preparation. The juicy, sweet cherry filling bubbles up around a soft, cake-like biscuit topping that gets perfectly golden and slightly crisp on top.
The Magic of Minimal Ingredients
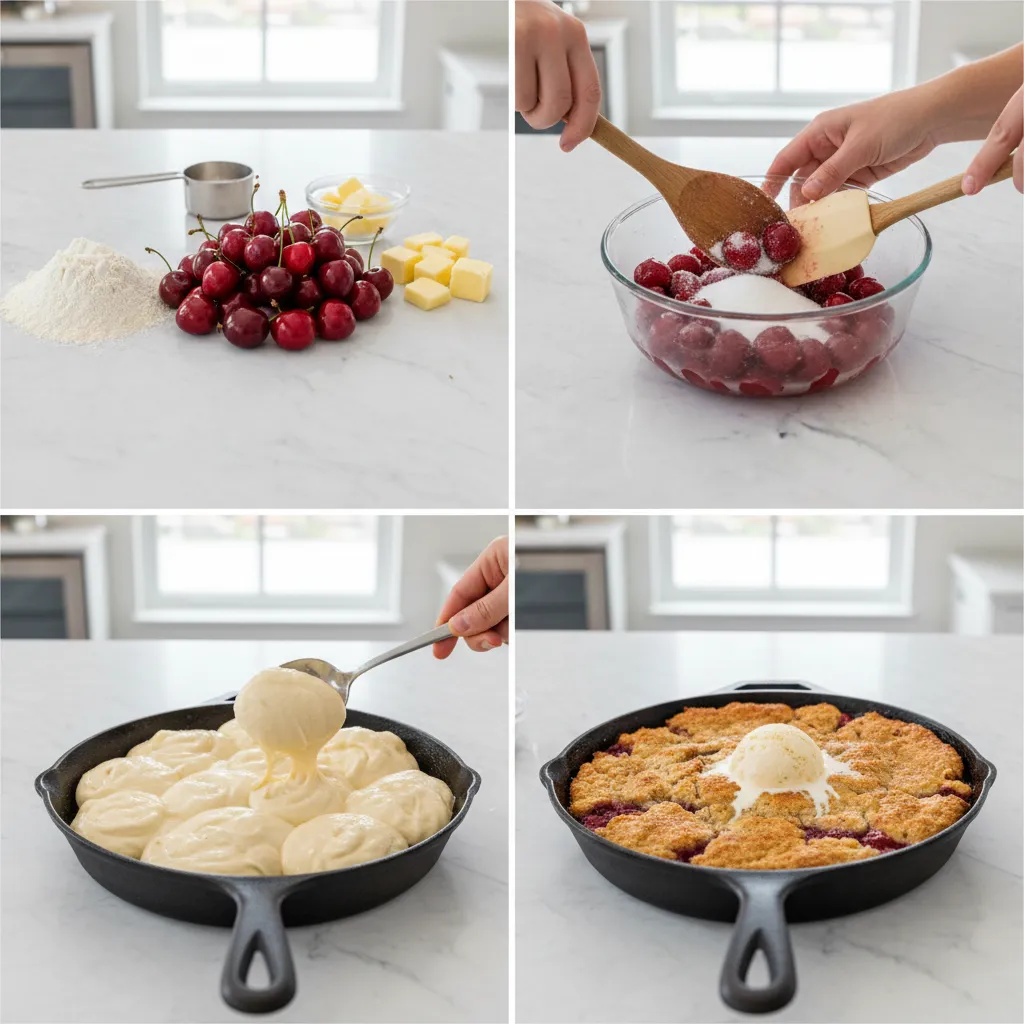
With just five core ingredients—canned cherry pie filling, a box of yellow cake mix, butter, almond extract, and a sprinkle of cinnamon—this recipe comes together in minutes. The cake mix acts as a brilliant shortcut, creating a consistently delicious topping without the fuss of measuring flour, sugar, and leavening agents. It saves you time and reduces cleanup, making it a perfect recipe for last-minute dessert cravings or unexpected guests. This approach makes it a go-to for anyone who wants homemade taste with minimal effort.
A Dessert for Every Occasion
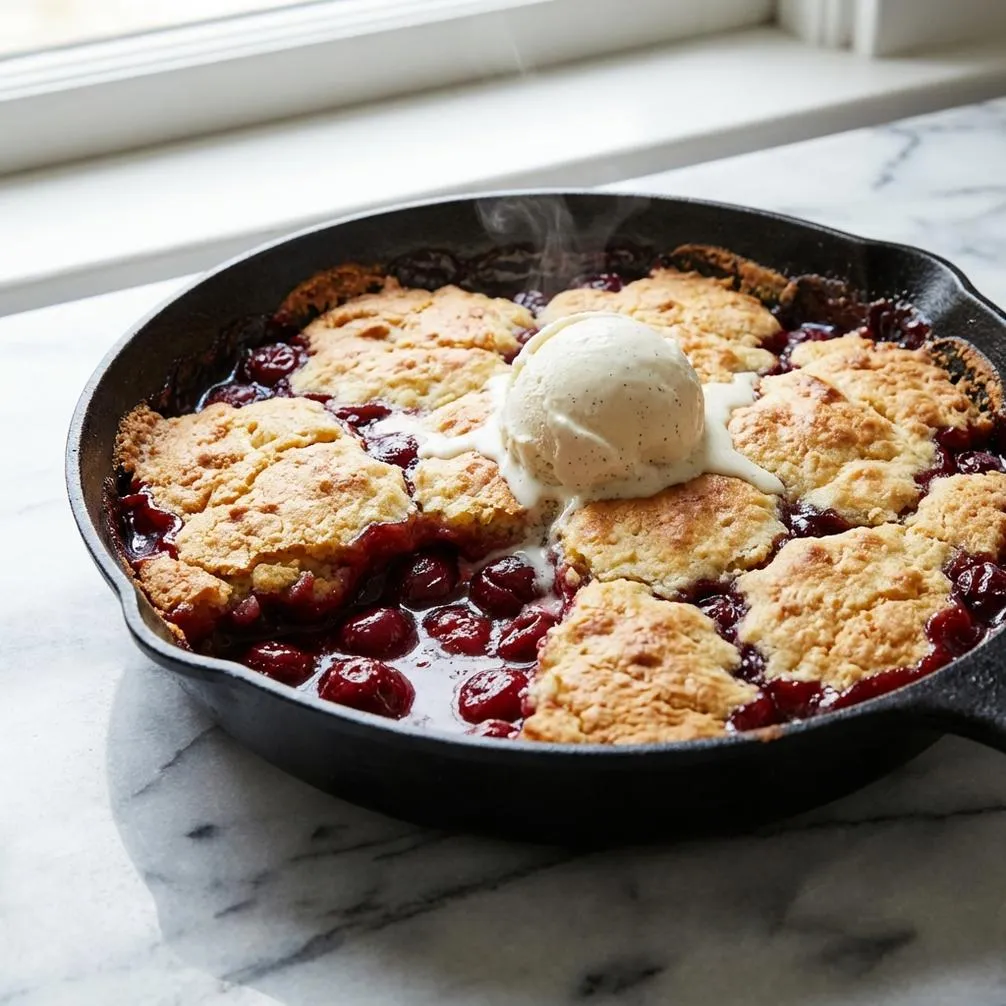
This cherry cobbler is incredibly versatile. Serve it warm from the oven with a scoop of vanilla ice cream for a classic, comforting treat. It’s equally delicious at room temperature, making it a great option for potlucks, picnics, or family gatherings. Because it’s so easy to assemble, you can prepare it ahead of time and bake it just before you’re ready to serve. The vibrant red of the cherries makes it a visually appealing dish for holidays like the Fourth of July or Christmas, too.
Perfecting Your Cherry Cobbler Topping
The topping is arguably the star of any cobbler. It needs to be the right balance of soft and sturdy, with a golden crust that gives way to a tender, cake-like interior. Our method creates that perfect texture every single time, soaking up just enough of the bubbling cherry juices without becoming soggy.
The Role of Butter
Melted butter is the key to this recipe’s topping. Instead of cutting cold butter into flour, we pour melted butter directly over the dry cake mix. As the cobbler bakes, the butter combines with the cake mix to form a rich, tender, and slightly crisp crust. This technique is not only easier but also produces a wonderfully even and golden-brown top. Make sure you drizzle the butter as evenly as possible to avoid dry patches of cake mix.
To Stir or Not to Stir?
A common question is whether to stir the cake mix into the cherries. For this recipe, do not stir. Simply sprinkle the dry cake mix over the cherry filling, then pour the melted butter on top. This layering is what creates the distinct textures of a classic cobbler: a jammy fruit bottom and a separate biscuit-style topping. As it bakes, the ingredients will meld together perfectly on their own. Resisting the urge to stir is crucial for achieving that classic cobbler texture.
Making This Easy Cherry Cobbler Recipe Your Own
While this five-ingredient version is fantastic as is, it also serves as a wonderful base for customization. Think of this Easy Cherry Cobbler Recipe as a starting point. Adding a few extra touches can align the dessert with your personal taste or what you happen to have in your pantry.
Fresh vs. Canned Cherries
This recipe calls for canned cherry pie filling for ultimate convenience. It’s already sweetened and thickened, which means you can dump it in the dish and go. However, if you have fresh or frozen cherries on hand, you can absolutely use them! For fresh, pitted cherries, you’ll need about four cups. Toss them with about 3/4 cup of sugar, two tablespoons of cornstarch, and a splash of lemon juice before adding them to the baking dish. This will create that signature syrupy filling as they bake. This dessert is a type of cobbler, a baked fruit dish with a biscuit or batter topping that has roots in American frontier cooking.
Fun Flavor Variations
Get creative by adding different spices or extracts. A pinch of nutmeg or cardamom in the topping can add a warm, complex flavor. Swapping the almond extract for vanilla extract is a simple change that works beautifully. For a bit of texture, consider sprinkling some slivered almonds or coarse sugar over the buttered cake mix before baking. This will add a delightful crunch to contrast with the soft fruit and tender topping.
Tips for the Best Homemade Cobbler
Even the simplest recipes benefit from a few expert tips. Following these suggestions will help you get a perfect result with your Sweet Cherry Cobbler Recipe every time. From preparation to serving, these small details make a big difference. This is truly an Easy Cherry Cobbler Recipe that any home cook can master.
Choosing Your Baking Dish
The right baking dish can affect how your cobbler bakes. A 9×13-inch glass or ceramic baking dish is ideal. These materials conduct heat evenly, which helps the filling bubble and the topping cook through without burning. A deeper dish is better than a shallow one to prevent the juicy cherry filling from bubbling over and making a mess in your oven. If you are concerned about spillage, place the baking dish on a larger, rimmed baking sheet before putting it in the oven.
Serving and Storage Suggestions
This sweet cherry cobbler is at its absolute best when served warm, about 15-20 minutes after it comes out of the oven. This allows it to set slightly, making it easier to scoop. A classic pairing is a scoop of vanilla bean ice cream, which melts into the warm filling. Whipped cream or even a drizzle of heavy cream are also excellent choices. If you have leftovers, cover the dish tightly and store it in the refrigerator for up to four days. You can reheat individual portions in the microwave for about 30-45 seconds.
Sweet Cherry Cobbler Recipe
Sweet Cherry Cobbler
Ingredients
Cherry Filling
- 2 cans cherry pie filling 21 ounces each
Topping
- 1 box yellow cake mix 15.25 ounces
- 0.5 cup unsalted butter melted
- 0.5 teaspoon almond extract
- 0.25 teaspoon ground cinnamon optional
Instructions
- Preheat oven to 375°F (190°C). Lightly grease a 9×13-inch baking dish.
- Pour cherry pie filling into the prepared dish, spreading evenly. Drizzle almond extract over the cherries.
- Sprinkle the dry yellow cake mix evenly over the cherry filling, covering the entire surface.
- Pour melted butter gently over the cake mix. If using, sprinkle cinnamon on top.
- Bake for 35-40 minutes, until topping is golden brown and cherry filling is bubbly.
- Cool for at least 15 minutes on a wire rack before serving. Serve warm with ice cream or whipped cream.
Notes
Frequently Asked Questions
Can I use fresh cherries for this recipe?
Yes, you can use fresh cherries. You will need about 4-5 cups of pitted sweet cherries. In a bowl, toss the fresh cherries with 3/4 cup of granulated sugar and 2 tablespoons of cornstarch to help thicken the filling as it bakes. Spread this mixture in the baking dish and proceed with the recipe as written.
Do I have to use yellow cake mix?
Yellow cake mix provides a classic, buttery flavor that complements the cherries well. However, you can certainly experiment with other flavors. A white cake mix or even a butter pecan cake mix would also be delicious alternatives for this sweet cherry cobbler recipe.
How do I know when the cherry cobbler is done baking?
You will know the cobbler is ready when the fruit filling is actively bubbling up around the sides of the dish and the topping has turned a deep golden brown. The center of the topping should be set and no longer look wet or doughy.
Can this cobbler be made ahead of time?
Yes, you can assemble the cobbler a few hours ahead of time. Prepare it up to the point of baking, then cover and refrigerate. When you are ready, bake it straight from the fridge, adding about 5-10 extra minutes to the baking time to account for the cold dish.
Conclusion
This Sweet Cherry Cobbler Recipe is more than just a dessert; it’s a slice of comfort. It proves that you don’t need a complicated recipe to create something truly special and memorable. With just a handful of ingredients and a few simple steps, you can bring the delicious taste of a homemade classic to your table. I hope this recipe brings as much joy and warmth to your home as it has to mine for all these years.