Growing up, the morning after St. Patrick’s Day was almost as exciting as the holiday itself. That’s because it meant my grandmother was making her legendary corned beef hash. However, my own attempts often ended in a soggy, disappointing mess. After years of testing, I finally cracked the code to making The BEST Crispy Corned Beef Hash Recipe, and it’s all about the technique.
Forget everything you know about mushy, bland hash. This method creates a dish with deeply savory, shredded corned beef and chunks of potato that are unbelievably crispy on the outside and fluffy on the inside. It’s a breakfast that truly satisfies, transforming simple leftovers into a meal worth celebrating. Indeed, The BEST Crispy Corned Beef Hash Recipe isn’t just a meal; it’s a feeling of comfort and home. This is the recipe that will make you look forward to leftovers.
Why This is The BEST Crispy Corned Beef Hash Recipe
Many hash recipes fail because they introduce too much moisture at the wrong time, which results in steaming instead of frying. My method is different. We focus on creating a dry environment in the pan, which is the key to achieving that signature crispy crust everyone craves. Furthermore, we build layers of flavor with simple ingredients, letting the corned beef and potatoes truly shine.
The Secret to Golden, Crispy Potatoes
The first step to perfection is par-cooking your potatoes. Boiling them until they are just fork-tender, then letting them cool and dry completely, is critical. This process removes excess surface starch and moisture. Consequently, when the potatoes hit the hot pan, they immediately start to form a golden-brown crust instead of turning to mush.
Perfecting the Savory Meat Crust
Similarly, the corned beef needs to be dry. After shredding or dicing your leftover corned beef, pat it with a paper towel. When you add it to the skillet with the potatoes, spread everything into an even layer and then—this is the most important part—leave it alone. Resisting the urge to stir allows the bottom layer to develop a deep, savory crust that provides an incredible texture. This makes it The BEST Crispy Corned Beef Hash Recipe you’ll ever try.
Key Ingredients for a Superior Hash
While the technique is important, the quality of your ingredients also plays a big role. You don’t need a long list of items, but choosing the right ones makes a significant difference in the final dish. A great hash starts with great components.
Choosing Your Corned Beef
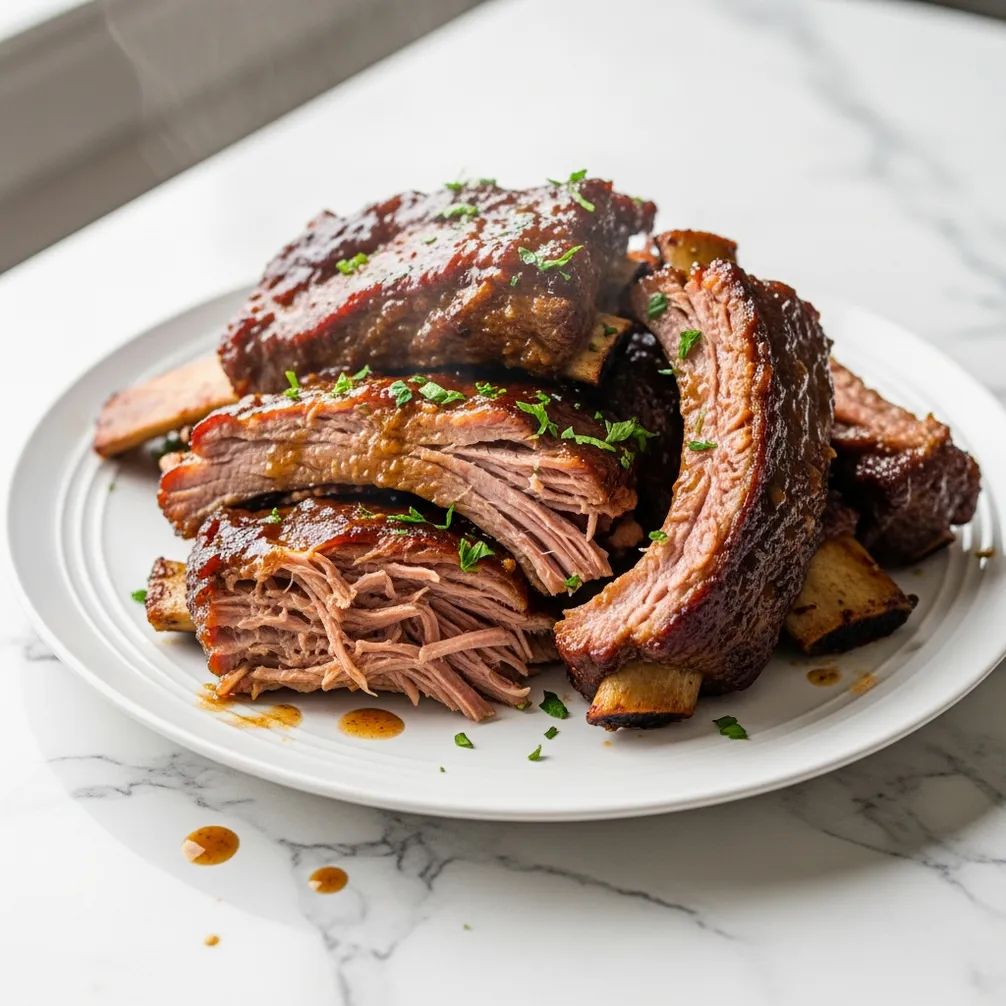
This recipe is ideal for using leftover corned beef from a holiday dinner. Both point-cut and flat-cut brisket work wonderfully. The point cut has more fat, which renders down and adds a lot of flavor and crispiness. On the other hand, the flat cut is leaner but still shreds beautifully. Don’t be afraid to use the fatty pieces; they are flavor gold.
The Right Potatoes Make a Difference
For the best texture, I recommend using waxy potatoes like Yukon Golds or red potatoes. They hold their shape well after boiling and frying, unlike starchy potatoes such as Russets, which can fall apart and become mealy. Yukon Golds, in particular, have a naturally buttery flavor that complements the salty corned beef perfectly.
Making a Leftover Corned Beef Hash Recipe Shine
One of the best things about this dish is its connection to tradition and resourcefulness. It’s the original “next-day” meal, designed to turn leftovers into something spectacular. Embracing this history makes cooking it even more meaningful. In fact, this is the ultimate leftover corned beef hash recipe for any occasion.
Tips for Repurposing St. Patrick’s Day Leftovers
If you have leftover corned beef, you’re already halfway to an amazing breakfast. Simply chop or shred the meat and you’re ready to go. You can also incorporate other leftovers, such as cooked carrots or cabbage, by dicing them finely and adding them to the pan with the onions. This adds another layer of flavor and makes your meal even more resourceful. This approach truly defines a great leftover corned beef hash recipe.
The History of Hash
The term “hash” comes from the French word hacher, which means “to chop.” The dish became popular in the United States as a way to use up leftovers from boiled dinners. It’s a simple, hearty meal with deep roots in American and British culinary history. According to Wikipedia, corned beef itself has a long history, associated with many cultures and traditions, particularly Irish-American cuisine. Making this dish connects you to a long line of home cooks who knew how to make something wonderful from simple ingredients.
Cooking Tips for Ultimate Crispiness
Mastering The BEST Crispy Corned Beef Hash Recipe comes down to a few final, but crucial, techniques. Pay attention to these details, and you will be rewarded with a perfectly textured dish every single time. After a big meal, the last thing you want is a complicated breakfast, but you also don’t want to compromise on flavor before you get to your holiday desserts.
Don’t Crowd the Pan
To get a good sear, your ingredients need space. Use a large, heavy-bottomed skillet, preferably cast iron, which retains heat exceptionally well. If you overcrowd the pan, the ingredients will steam instead of fry, and you will lose the chance to build that amazing crust. If you’re doubling the recipe, it is better to cook it in two separate batches.
Patience is a Virtue (The “Don’t Touch” Rule)
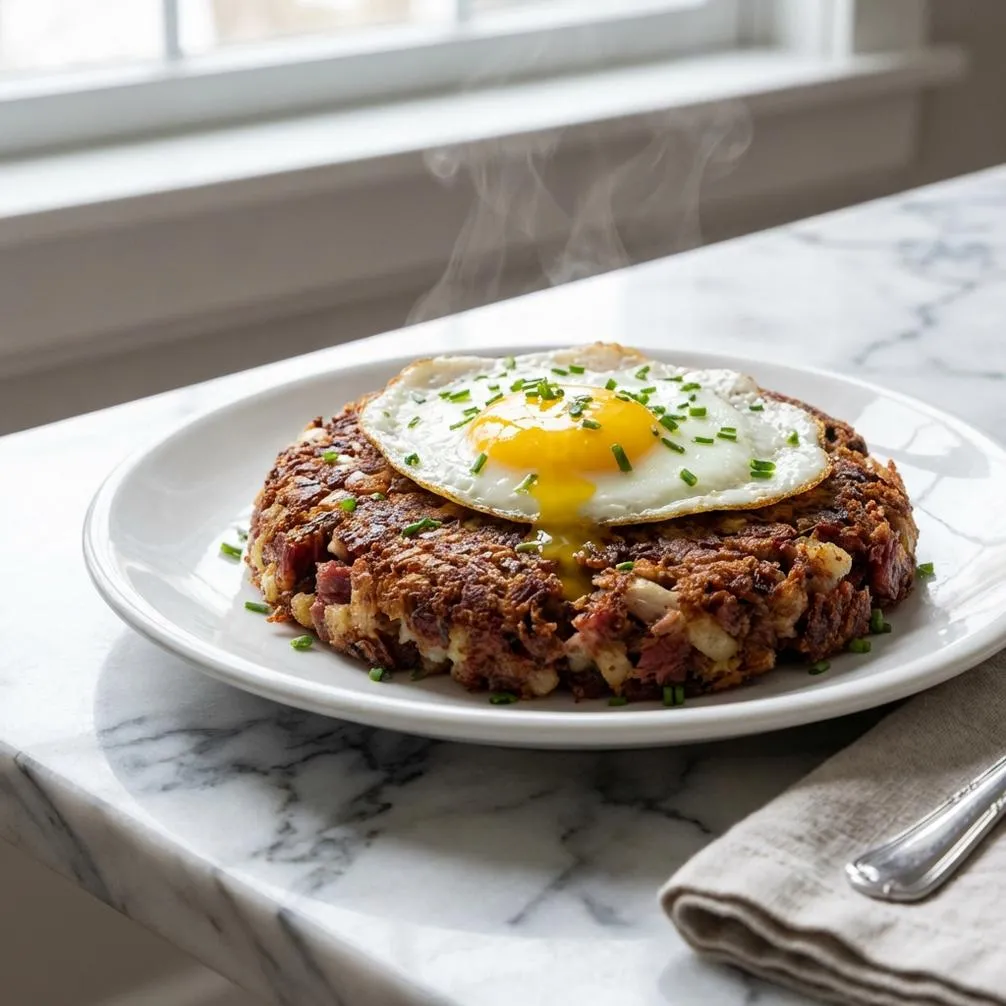
Once you press the hash mixture into the pan, let it cook undisturbed for at least 5-7 minutes. You’ll hear it sizzling and see the edges turning brown. This is when the magic happens. After that initial sear, you can flip the hash in sections and let the other side crisp up. This two-step searing process creates a wonderful contrast between the crunchy exterior and the tender interior.
The BEST Crispy Corned Beef Hash Recipe
The BEST Crispy Corned Beef Hash Recipe
Ingredients
Corned Beef Hash
- 1 lb cooked corned beef chilled and diced into 1/2-inch pieces
- 1.5 lb Yukon Gold potatoes peeled and diced into 1/2-inch pieces
- 1 large yellow onion finely chopped
- 2 tbsp unsalted butter
- 2 tbsp olive oil
- 0.5 teaspoon black pepper freshly ground
- 0.25 teaspoon salt or to taste
- 2 tbsp fresh parsley chopped, for garnish
Optional Eggs for Serving
- 4 large eggs fried or poached for serving
Instructions
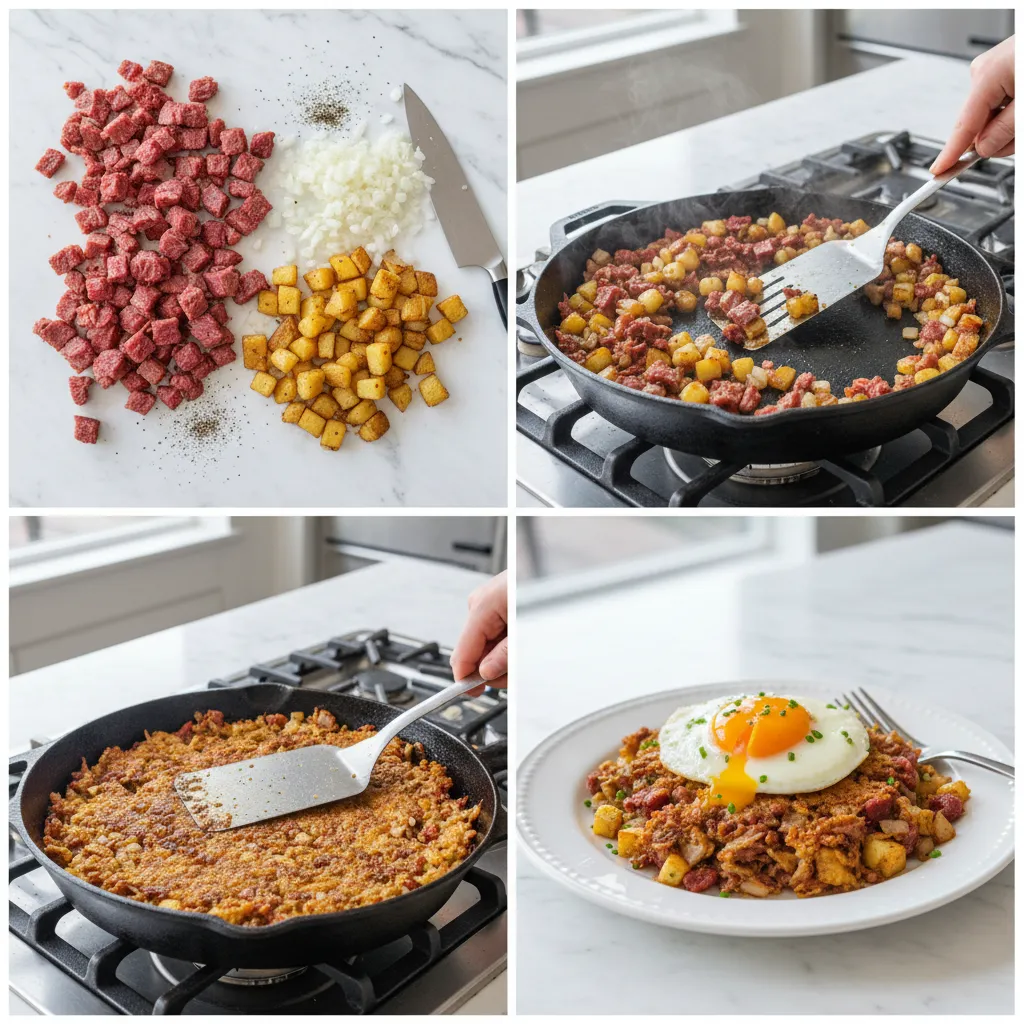
- Place the diced potatoes in a medium pot and cover with cold salted water. Bring to a boil and cook for 5–7 minutes until just tender when pierced with a fork. Do not overcook. Drain well and spread the potatoes on a baking sheet to cool and dry for at least 10 minutes.
- Heat the olive oil and butter in a large cast-iron or non-stick skillet over medium-high heat. Add the chopped onion and cook for 5–6 minutes, stirring occasionally, until softened and translucent.
- Add the dried potatoes and diced corned beef to the skillet. Gently toss to combine with the onions. Press the mixture firmly into an even layer using a spatula. Season with salt and black pepper and cook undisturbed for 6–8 minutes until a deep golden crust forms on the bottom.
- Flip the hash in large sections with a spatula. Continue cooking for another 5–7 minutes, breaking it slightly but allowing the other side to become crispy.
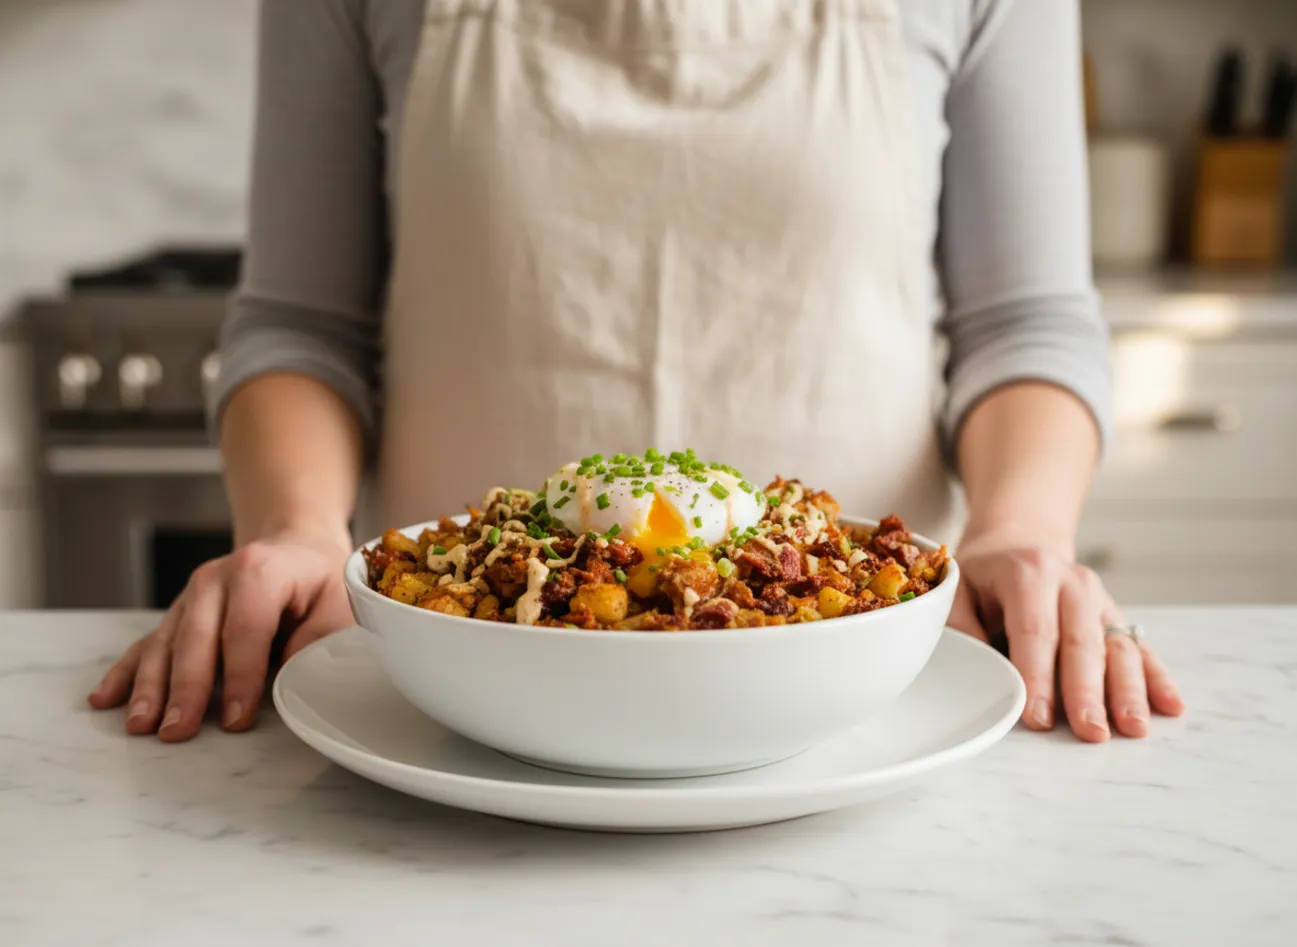
- Cook the eggs to your liking while the hash finishes cooking. Serve the crispy corned beef hash immediately topped with fresh parsley and a perfectly cooked fried or poached egg if desired.
Notes
Frequently Asked Questions
Why is my corned beef hash mushy?
Mushy hash is almost always caused by excess moisture. This can happen if you over-boil the potatoes, don’t dry them properly after boiling, or overcrowd the pan, which causes the ingredients to steam rather than fry. Following the steps to par-cook and dry the potatoes is essential for a crispy result.
Should you boil potatoes before making hash?
Yes, absolutely. Boiling the potatoes first (par-cooking) is a critical step. It ensures the inside of the potato chunks are fluffy and fully cooked while allowing the outside to get incredibly crispy in the skillet. Raw potatoes would take too long to cook through in the pan and would not develop the same texture.
What do you serve with corned beef hash?
Corned beef hash is traditionally served with a fried or poached egg on top, as the runny yolk creates a delicious sauce. It’s a fantastic breakfast or brunch dish on its own, but you can also serve it with a side of toast, a simple green salad with a vinaigrette to cut the richness, or some fresh fruit.
Can I use canned corned beef for this recipe?
While this leftover corned beef hash recipe is designed for leftover brisket, you can certainly use canned corned beef. Simply drain the canned beef well and break it up into chunks. Because it is much softer, be gentle when mixing it with the potatoes. You may need to adjust the salt, as canned varieties can be saltier.
Conclusion
Creating The BEST Crispy Corned Beef Hash Recipe is about more than just following steps; it’s about understanding the simple science of texture and flavor. By controlling moisture and using patient pan-frying techniques, you can transform humble leftovers into a truly memorable meal. I hope this recipe brings the same joy and comfort to your table that it has to mine for so many years. Enjoy