I remember my grandmother telling me that finding a four-leaf clover was a sign of great things to come. We’d spend hours in her garden, searching for that lucky charm. While we didn’t always find one, we always ended our day by baking something special. That feeling of simple joy is exactly what I wanted to capture with these Easy St. Patrick’s Day Cookies for a Sweet Celebration. They are more than just a dessert; they are a small, edible piece of luck you can share with your family.
These cookies are designed to be fun and festive without any fuss. The dough is straightforward, the shapes are cheerful, and the decorating part is where the real magic happens. It’s a perfect activity to get the kids involved in the kitchen, creating memories that last long after the last crumb is gone. After a hearty St. Patrick’s Day dinner, bringing out a plate of these vibrant green shamrocks always brings a smile to everyone’s face. Making these Easy St. Patrick’s Day Cookies for a Sweet Celebration has become a beloved tradition in my home, and I am so excited to share it with you.
Why These Shamrock Cookies Are Perfect for March 17th
When it comes to holiday baking, simplicity is often the secret ingredient. These Easy St. Patrick’s Day Cookies for a Sweet Celebration are designed for just that. They don’t require complicated techniques or hard-to-find ingredients, making them the perfect project for bakers of all skill levels. The result is a wonderfully festive treat that looks impressive and tastes even better.
A Fun Activity for the Whole Family
One of the best parts about this recipe is how wonderfully it brings people together. The steps are simple enough for little hands to help with mixing, rolling, and, of course, cutting out the shamrock shapes. Decorating is a blank canvas for creativity. You can set out bowls of green icing, different shades of sprinkles, and let everyone design their own lucky charm. It’s an afternoon of fun that ends with a delicious reward.
The Perfect Festive Flavor and Texture
These cookies strike a beautiful balance. The cookie itself is a classic butter cookie—sturdy enough to hold its shape and decorate, yet soft and tender when you take a bite. It has a rich, buttery flavor with a hint of vanilla that pairs perfectly with the sweet, simple icing. It’s a classic taste that everyone loves, dressed up in its holiday best for a truly sweet celebration.
Gathering Your Ingredients for These Easy St. Patrick’s Day Cookies
The foundation of any great cookie is quality ingredients. The good news is that this recipe relies on pantry staples you likely already have on hand. Before you begin, take a moment to gather everything you need. This small step makes the whole baking process go much more smoothly.
The Core Components
At its heart, this is a simple butter cookie dough. You will need unsalted butter, softened to room temperature. This is important for getting a light, creamy texture when you mix it with the granulated sugar. Next, you’ll need one large egg and a dash of pure vanilla extract for flavor and richness. For the dry ingredients, you’ll use all-purpose flour, a pinch of salt to balance the sweetness, and a little baking powder to give the cookies a slight lift.
For the Festive Green Icing
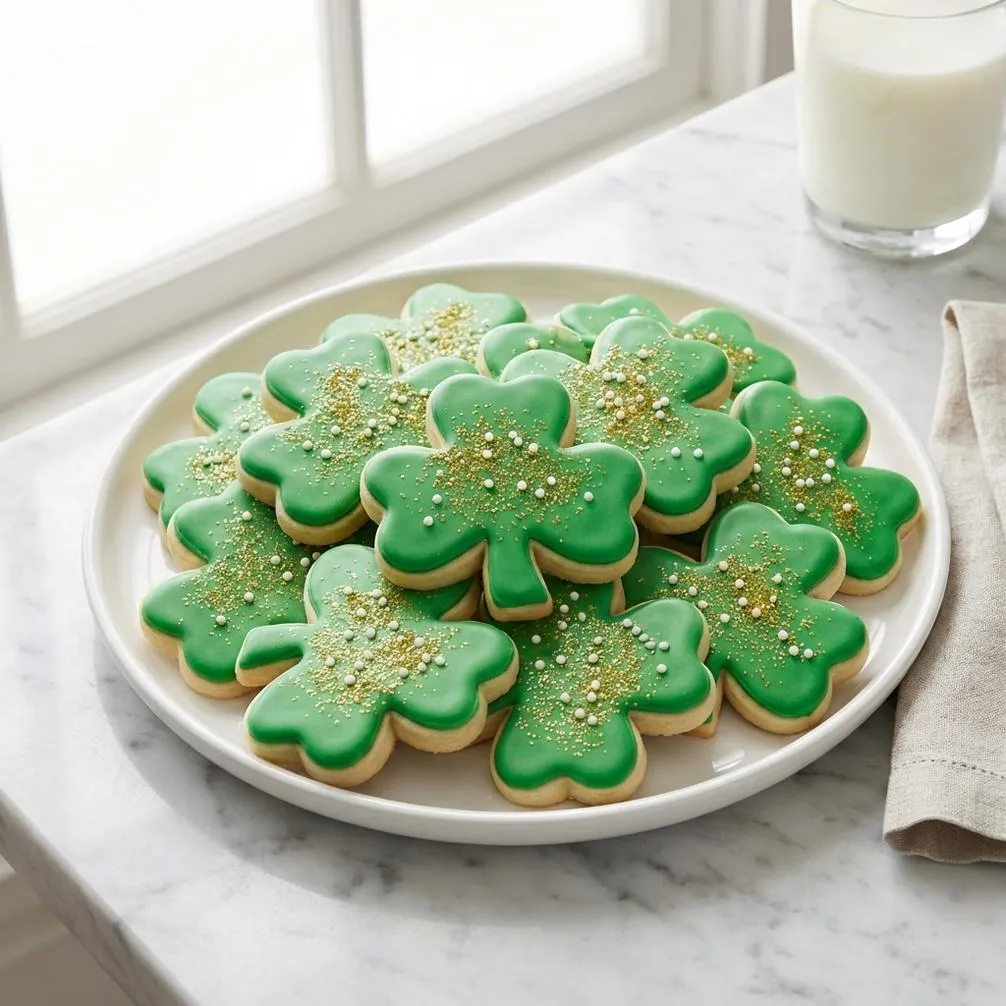
The decoration is what makes these cookies scream St. Patrick’s Day. For our simple royal icing, you will need powdered sugar, a little milk or water to get the right consistency, and a touch of vanilla or almond extract for flavor. Most importantly, you will need green food coloring. I recommend using a gel food coloring, as it provides a vibrant, deep green without adding too much extra liquid to your icing. And don’t forget the sprinkles! Green sanding sugar, shamrock-shaped sprinkles, or even gold ones add that final touch of festive flair.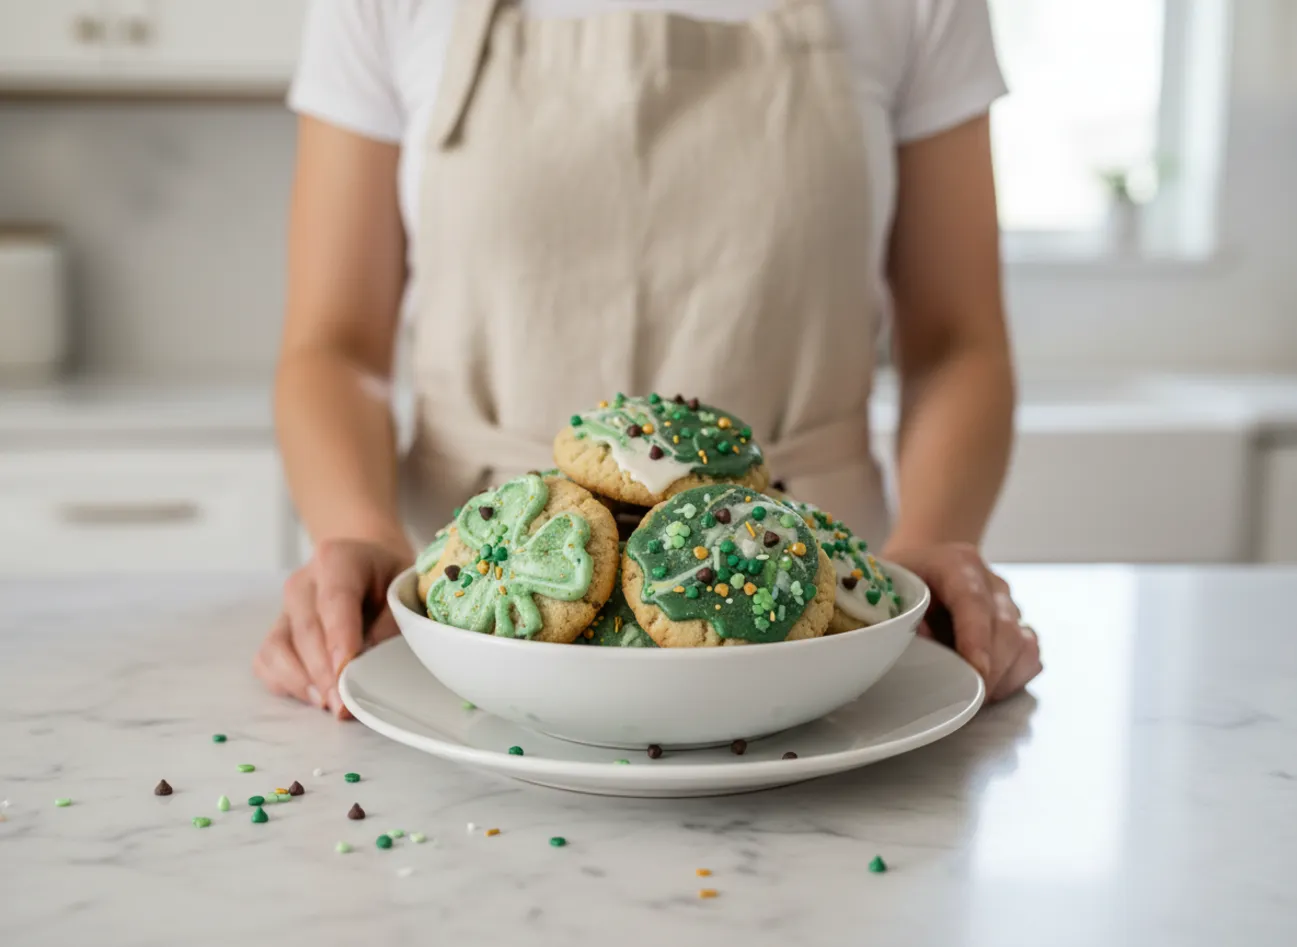
Mastering Our Favorite St. Patrick’s Day Cookie Recipes
A great cookie dough is all about technique. While the steps are simple, paying attention to a few key details will give you perfect, bakery-quality results every time. From mixing to chilling, each stage plays a vital part in creating the ideal base for your shamrock creations. These techniques are common across many St. Patrick’s Day cookie recipes.
The Importance of Chilling the Dough
If there is one step you absolutely should not skip, it’s chilling the dough. After you mix your ingredients, the dough will be quite soft. Chilling it in the refrigerator for at least an hour does two crucial things. First, it solidifies the butter. When the cold butter hits the hot oven, it melts slowly, which helps the cookies hold their shape instead of spreading into thin, flat discs. Second, it allows the flour to fully hydrate, which results in a more tender cookie with a better flavor. This is a fundamental step for any classic cutout cookie.
Rolling and Cutting for Perfect Shamrocks
Once your dough is firm and chilled, it’s time to roll it out. Lightly flour your work surface and rolling pin to prevent sticking. I recommend rolling the dough to about a ¼-inch thickness. This gives you a cookie that’s substantial enough to handle but not so thick that it becomes hard. Use a shamrock-shaped cookie cutter and press down firmly. Arrange the cutouts on a parchment-lined baking sheet, leaving a little space between each one.
Decorating Your Cookies for a Sweet Celebration
Now for the best part: bringing your shamrock cookies to life with color and sparkle. Decorating is where you can truly personalize your treats. Whether you keep it simple with a single color or get intricate with designs, this is the final step in making your Easy St. Patrick’s Day Cookies for a Sweet Celebration truly special.
Achieving the Perfect Icing Consistency
The key to beautifully iced cookies is getting the icing consistency just right. For outlining your shamrocks, you want a slightly thicker icing that holds its shape. Think of the consistency of toothpaste. For “flooding” or filling in the cookie, you’ll want a thinner icing. You can achieve this by adding milk or water, just a few drops at a time, until it’s the consistency of honey. A great trick is to use a thicker icing to pipe an outline around the edge of the cookie first, let it set for a few minutes, and then fill it in with the thinner icing. This dam prevents the icing from spilling over the sides.
Finishing Touches and Creative Ideas
Once your base layer of green icing is on, let your imagination run wild. Add sprinkles while the icing is still wet so they stick properly. You can use different shades of green for a marbled effect or pipe on delicate white details with a smaller piping tip. For a touch of luck, add some gold sanding sugar or edible glitter. Let the cookies sit at room temperature for a few hours, or until the icing is completely firm to the touch, before you stack or serve them.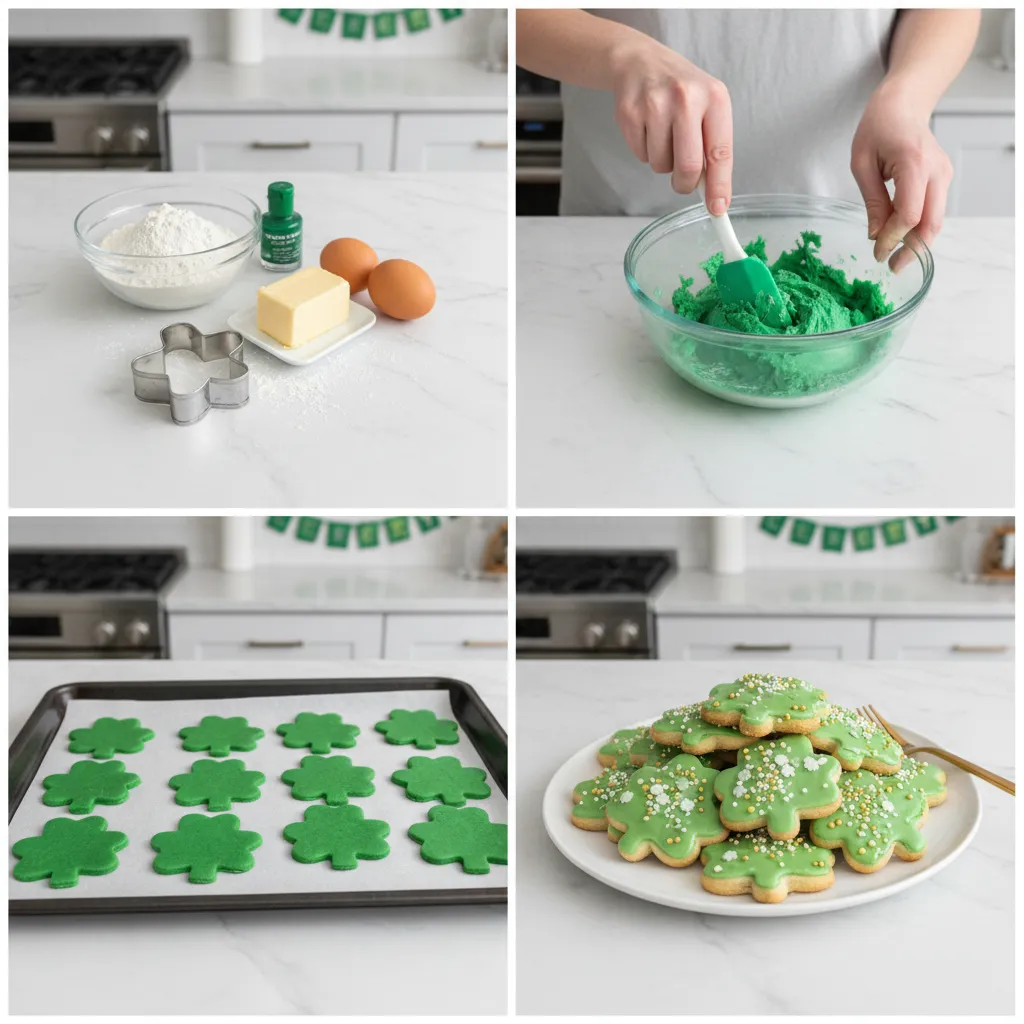
Easy Shamrock Butter Cookies
Easy Shamrock Butter Cookies
Ingredients
Cookie Dough
- 1 cup unsalted butter softened
- 1 cup granulated sugar
- 1 large egg room temperature
- 1 teaspoon vanilla extract
- 2.75 cups all-purpose flour
- 1 teaspoon baking powder
- 0.5 teaspoon salt
Royal Icing
- 2 cups powdered sugar
- 2-3 tablespoons milk
- 0.5 teaspoon vanilla extract
- a few drops green gel food coloring
- as needed sprinkles optional for decorating
Instructions
- In a large mixing bowl, beat the softened butter and granulated sugar on medium-high speed until light and fluffy, about 3–4 minutes.
- Add the egg and vanilla extract to the butter mixture and beat until fully combined.
- In a separate bowl, whisk together the flour, baking powder, and salt.
- Gradually add the dry ingredients to the wet ingredients on low speed until just combined. Do not overmix. The dough will be soft.
- Divide the dough in half, flatten into discs, wrap in plastic, and refrigerate for at least 1 hour until firm.
- Preheat oven to 350°F (175°C) and line two baking sheets with parchment paper.
- Roll one disc of dough to ¼-inch thickness on a floured surface. Cut out shamrock shapes and place 1 inch apart on prepared sheets. Reroll scraps as needed.
- Bake for 9–11 minutes, until edges are lightly golden. Cool on the sheet for 5 minutes, then transfer to a wire rack to cool completely.
- Whisk together powdered sugar, 2 tablespoons milk, and vanilla extract. Add additional milk if needed for consistency. Stir in green gel food coloring.
- Decorate cooled cookies with icing and sprinkles. Let icing set completely before storing.
Notes
Frequently Asked Questions
1: What makes cookies chewy vs. crispy?
The texture of a cookie is mainly determined by the ratio of ingredients and baking time. Chewy cookies typically have a higher moisture content, often from using brown sugar, more fat, or slightly underbaking them. Crispy cookies usually have a lower moisture content, often achieved with more white sugar, less fat, and a longer baking time that allows more moisture to evaporate.
2: Can I make this St. Patrick’s Day cookie dough ahead of time?
Absolutely! This dough is perfect for making ahead. You can prepare the dough and store it, well-wrapped, in the refrigerator for up to 3 days. You can also freeze the dough discs for up to 3 months. Just let the dough thaw in the refrigerator overnight before you plan to roll and bake it.
3: What’s the best way to get a vibrant green color in the icing?
For the most vibrant color, I highly recommend using gel food coloring instead of liquid. Gel colorings are much more concentrated, so you only need a small amount to get a deep, rich green. This also prevents you from adding too much liquid to your icing, which can make it runny and difficult to work with.
4: Are there any alternatives to a shamrock cookie cutter?
Of course! If you don’t have a shamrock cutter, you can easily use a simple round cutter to make circle cookies and decorate them with green icing and festive sprinkles. Another creative idea is to use a small heart-shaped cutter. You can arrange three or four heart cutouts together with their points touching to form a clover shape before baking.
A Sweet and Lucky Tradition
Baking these Easy St. Patrick’s Day Cookies for a Sweet Celebration is more than just making a dessert; it’s about starting a tradition. It’s about the laughter shared while rolling out the dough and the proud smiles after decorating the perfect shamrock. I hope this simple recipe brings a little bit of luck and a whole lot of joy to your kitchen this March. Happy baking