One of my favorite memories is the excitement surrounding St. Patrick’s Day as a kid. My grandmother would always make something special and, most importantly, green! It wasn’t about elaborate meals; instead, it was about capturing the fun of the holiday. That spirit of simple joy is exactly what I wanted to recreate with these St Patrick’s Day Green Shake Pudding Cups. They have the creamy, minty flavor of that famous seasonal shake, but they come together in minutes with no blender required. These dessert cups are a fantastic way to get kids involved in the kitchen. In fact, making these St Patrick’s Day Green Shake Pudding Cups has become a new tradition in my own home, bringing smiles and a little bit of magic to our celebration.
Why You’ll Love These Green Pudding Cups
These St Patrick’s Day Green Shake Pudding Cups are a real winner for any festive gathering. Their charm lies in their simplicity. You don’t need any special baking skills or complicated equipment to whip them up. In addition, they are incredibly kid-friendly, from the preparation to the eating. Kids love shaking the pudding mix in a jar and are always thrilled to see the vibrant green color appear. It’s a perfect no-bake dessert that saves you time and oven space.
The Perfect Party Treat
When planning a party menu, finding desserts that are easy to serve is a huge plus. These individual pudding cups are ideal for that reason. You can make them ahead of time and store them in the fridge, which frees you up to manage other party details. Moreover, they look so festive on a dessert table, especially next to other holiday party sides and snacks. Their bright green hue and creamy topping instantly say “St. Patrick’s Day.”
A Fun, No-Bake Activity
Beyond being a delicious treat, this recipe offers a great opportunity for a fun family activity. The steps are so straightforward that even the youngest children can help. Let them pour the milk, add the food coloring, and shake the jar. This hands-on experience not only keeps them entertained but also builds their confidence in the kitchen. Consequently, you create both a tasty dessert and a lasting memory.
Assembling Your St Patrick’s Day Pudding Cups
Gathering your ingredients for this recipe is as simple as the preparation itself. You only need a handful of common items that you can easily find at any grocery store. The key is the instant vanilla pudding mix, which serves as the base for our creamy, dreamy dessert. This simple foundation allows the mint and vanilla flavors to shine through beautifully.
Essential Ingredients
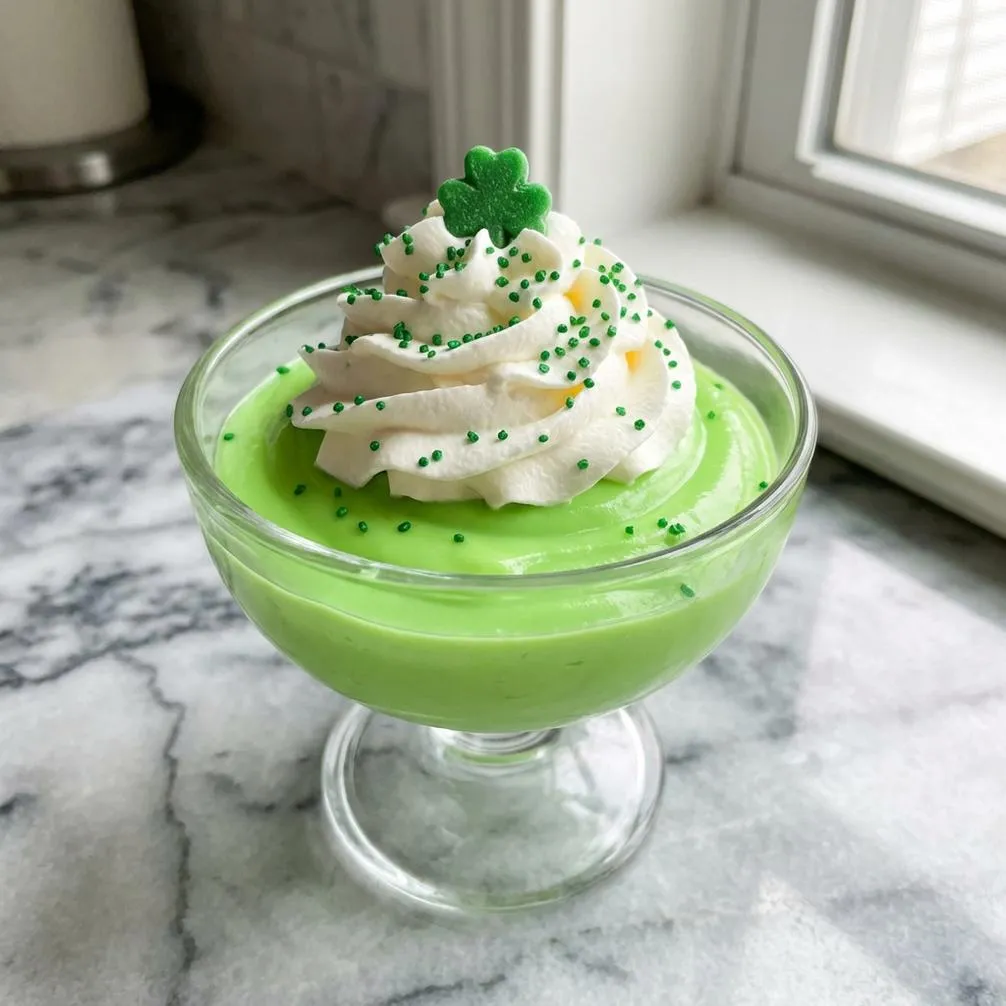
For the base of the St Patrick’s Day Green Shake Pudding Cups, you will need a box of instant vanilla pudding, cold milk, a bit of peppermint extract, and some green food coloring. For the cookie crust, crushed chocolate sandwich cookies (like Oreos) work perfectly, adding a wonderful texture and flavor contrast. Finally, a topping of whipped cream and some festive green sprinkles or a cherry gives them a polished, shake-like appearance.
The Magic of Mint
The secret to capturing that classic green shake flavor is the peppermint extract. A little goes a long way, so be careful not to overdo it. Start with just a quarter teaspoon, mix it in, and give it a taste. You can always add another drop or two if you prefer a stronger minty flavor. This allows you to completely control the taste and make it just right for your family.
Making the Shamrock Shake Pudding Cups Recipe
This dessert is inspired by the famous Shamrock Shake, but it transforms those flavors into a spoonable treat. The combination of mint and vanilla is classic for a reason, and this Shamrock Shake Pudding Cups recipe delivers that taste in a new and exciting way. It’s a creative twist that will surprise and delight anyone who tries it.
Layering for Success
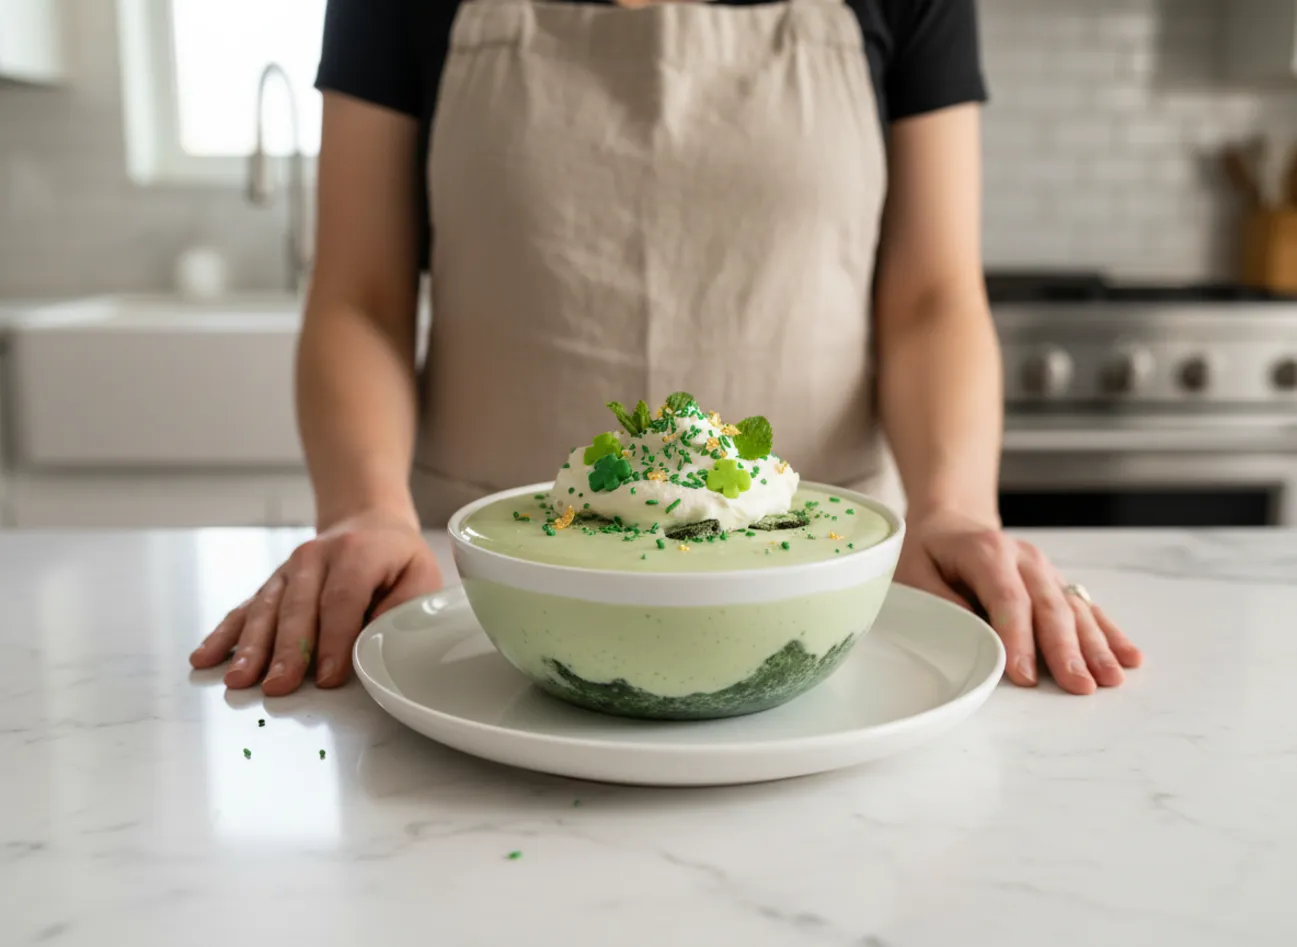
The beauty of these pudding cups is in the layers. First, you start with a crunchy, dark chocolate cookie crust at the bottom of each cup. Next, you gently spoon the vibrant green mint pudding over the crust. The contrast between the dark base and the bright green pudding is visually striking. For the final touch, you add a generous swirl of whipped cream on top. Each spoonful gives you a perfect mix of crunchy, creamy, and cool textures. This dessert is a great example of a modern pudding, which often involves layered ingredients.
Get Creative with Toppings
While whipped cream and sprinkles are a classic choice, feel free to get creative with your toppings. A drizzle of chocolate syrup, some mini chocolate chips, or even a few fresh mint leaves can add another dimension of flavor and style. You could also crumble some extra chocolate cookies on top for added crunch. Customizing the toppings for this Shamrock Shake Pudding Cups recipe makes the dessert even more personal and fun.
Tips for the Best Pudding Cups
Making these festive green dessert cups is nearly foolproof, but a few simple tips can make them even better. Following these small suggestions will give you the best possible texture and flavor, making your St. Patrick’s Day treat a certified hit.
Use Cold Milk
For instant pudding to set correctly, you must use very cold milk. The cold temperature reacts with the starches in the pudding mix, causing it to thicken almost instantly. Using room temperature or warm milk will result in a soupy, runny pudding that won’t set properly. Therefore, take the milk straight from the refrigerator right before you start mixing.
Let Them Chill
Although the pudding thickens quickly, allowing the finished cups to chill in the refrigerator for at least 30 minutes before serving is a good idea. This brief chilling period allows the flavors to meld together and gives the pudding a firmer, more satisfying texture. It also makes the cookie crust soften just slightly, making it easier to spoon through. You can even prepare these St Patrick’s Day Green Shake Pudding Cups a day in advance.
St. Patrick’s Day Green Shake Pudding Cups
St. Patrick’s Day Green Shake Pudding Cups
Ingredients
Pudding Cups
- 1 package instant vanilla pudding mix 3.4 oz
- 2 cups whole milk cold
- 0.25 teaspoon peppermint extract
- 4-6 drops green food coloring
- 12 pieces chocolate sandwich cookies like Oreos, crushed
- 1 cup whipped cream or prepared whipped topping
- as needed green sprinkles for garnish
- 6 pieces maraschino cherries optional, for garnish
Instructions
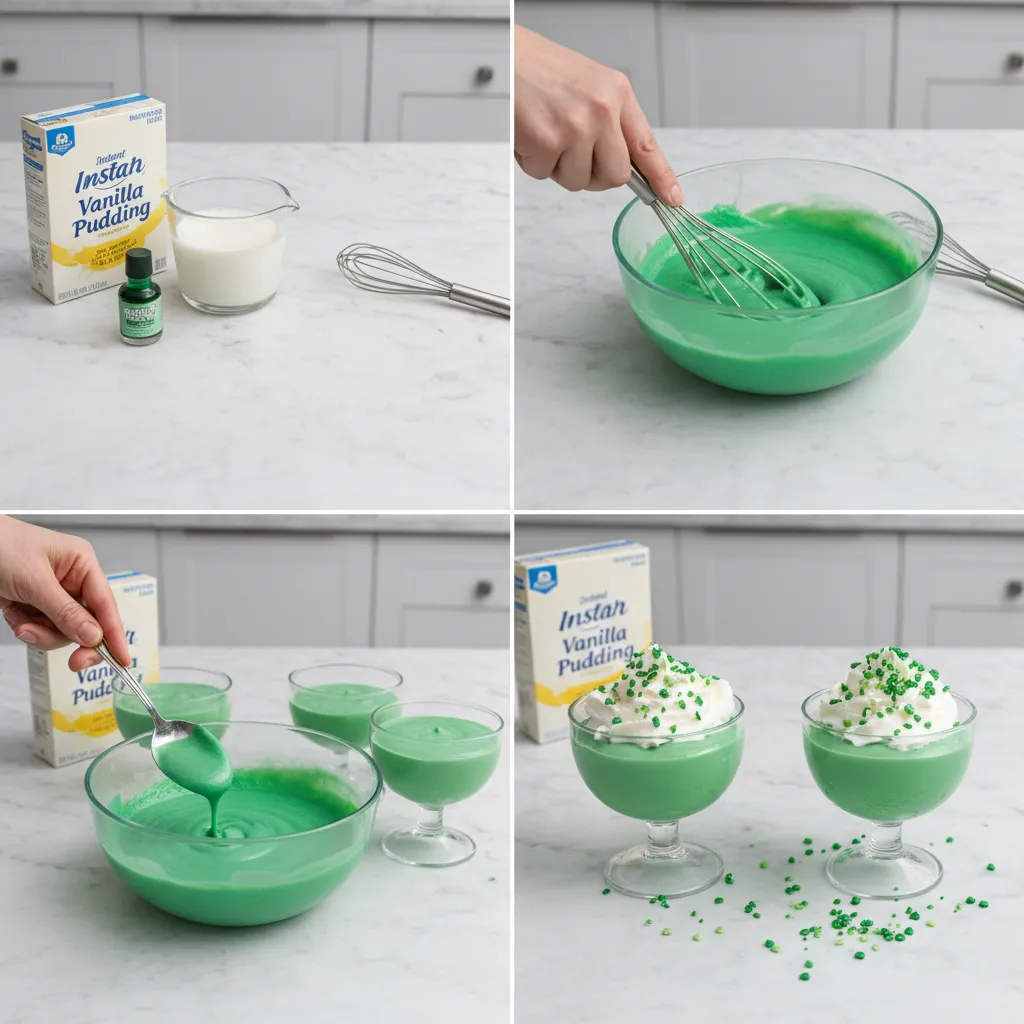
- Place the chocolate sandwich cookies in a zip-top bag and crush them into coarse crumbs with a rolling pin. Divide crumbs evenly among 6 dessert cups and press down gently to form a base layer.
- In a medium bowl or jar, combine the instant vanilla pudding mix and cold milk. Whisk or shake vigorously for about 2 minutes until the mixture begins to thicken.
- Stir in the peppermint extract and green food coloring, adding drops until the desired green shade is achieved.
- Spoon the green pudding evenly over the cookie crusts in each cup.
- Refrigerate the cups for at least 30 minutes to allow the pudding to set completely.
- Just before serving, top each cup with a dollop of whipped cream, green sprinkles, and a maraschino cherry if desired.
Notes
Frequently Asked Questions
1: What can I use instead of peppermint extract for flavor?
If you don’t have peppermint extract or prefer a different flavor, you can use vanilla extract for a simple, creamy taste. For another fun twist, a drop of almond extract also works nicely with the vanilla pudding base. You could even use mint extract, which has a spearmint flavor instead of peppermint.
2: Can I make these pudding cups dairy-free?
Yes, you can absolutely make a dairy-free version. Use a dairy-free instant vanilla pudding mix and substitute the whole milk with a cold, unsweetened plant-based milk like almond milk or oat milk. Also, use a dairy-free whipped topping made from coconut cream or soy. Remember to check that your chocolate sandwich cookies are also dairy-free.
3: How long do these pudding cups last in the fridge?
These St Patrick’s Day Green Shake Pudding Cups can be stored in the refrigerator for up to 3 days. For best results, cover them tightly with plastic wrap to prevent a skin from forming on the pudding. It is best to add the whipped cream and sprinkles just before serving so the topping stays fresh and the sprinkles don’t bleed their color.
4: What are some other topping ideas for these green pudding cups?
Besides whipped cream and sprinkles, you can get very creative! Mini chocolate chips, shaved chocolate, a drizzle of chocolate or caramel sauce, or crumbled Andes mints are all excellent choices. For a bit of crunch, you could add chopped nuts or extra cookie crumbles on top.
Conclusion
These St Patrick’s Day Green Shake Pudding Cups are more than just a dessert; they are a simple way to bring a little festive fun to your celebration. With their bright color and delicious mint-chocolate flavor, they are certain to be a favorite for both kids and adults. Because the recipe is so easy and forgiving, it’s the perfect treat to make when you want maximum holiday impact with minimal effort. Enjoy