Friday nights in my house were always pizza nights. My grandmother would let me stand on a stool, my hands covered in flour, as I tried to shape my own mini pizza dough. The toppings were exciting, but she always said, “Nora, the soul of the pizza is in the crust.” She was right. For years, I chased that perfect balance she achieved: a crust that was wonderfully crisp on the bottom yet delightfully chewy inside. This recipe is the culmination of that journey. It’s more than just a recipe for The Crust Pizza; it’s a guide to creating the foundation for countless memorable meals.
Many recipes focus only on the toppings, but we are starting with what matters most. A truly remarkable pizza begins and ends with its base. Achieving that ideal texture is the secret to moving beyond average homemade pizza to something special. This guide simplifies the process, showing you how to make The Crust Pizza that will have everyone asking for your secret. Once you master the crust, you can top it with anything you desire. After a satisfying pizza dinner, you might even have room for a simple dessert, like a sweet cherry cobbler.
Why The Crust Pizza Matters Most
A truly unforgettable pizza experience rests on its foundation. While a colorful assortment of toppings gets all the attention, it’s the crust that does the heavy lifting. The Crust Pizza is not just a carrier for cheese and sauce; it provides the essential texture and flavor that defines the entire dish. Without a great crust, even the most expensive ingredients fall flat.
Think of it as the canvas for your culinary art. A soggy, bland base can ruin the experience, but a perfectly baked crust—golden brown, with a satisfying crunch and a soft, airy interior—makes every bite a joy. This recipe focuses on creating that perfect canvas every single time.
The Balance of Crispy and Chewy
The magic of a world-class pizza crust lies in its dual texture. You want a bottom that is firm and crisp enough to hold its shape when you pick up a slice, with no dreaded drooping. This crispiness comes from high heat and proper hydration in the dough.
At the same time, the inside of the crust should be light, airy, and pleasantly chewy. This chewiness develops from gluten formation during kneading and the fermentation process during rising. Our method carefully balances these elements, giving you a crust that is both structurally sound and wonderfully tender. It is the defining feature of an amazing homemade pizza.
Ingredients That Make a Difference
You do not need a long list of complicated ingredients for a stellar pizza crust. In fact, simplicity is key. The quality of just a few basic items makes a huge impact.
Flour is the most important component. While all-purpose flour works, bread flour contains more protein, which helps develop stronger gluten for a chewier texture. Yeast provides the lift, creating those beautiful air pockets. A touch of sugar gives the yeast something to feed on and adds a hint of flavor and browning. Finally, salt is critical for flavor and for controlling the yeast’s activity. Together, these simple parts form the heart of The Crust Pizza.
Mastering Your Pizza Dough Technique
Making great pizza dough is less about complex steps and more about understanding the technique. Anyone can combine flour, water, and yeast, but knowing how to treat the dough is what separates good pizza from great pizza. The process should be relaxing and rewarding, not intimidating.
The key is giving the dough the attention it needs at two critical stages: kneading and proofing. Rushing these steps is the most common mistake home cooks make. With a little patience, you can develop a dough that is smooth, elastic, and full of flavor, ready to become the perfect base for your pizza.
The Art of Kneading
Kneading is the physical process that develops gluten, the protein network that gives dough its structure and chew. You can use a stand mixer with a dough hook, but kneading by hand is deeply satisfying. The goal is to work the dough until it transforms from a shaggy, sticky mess into a smooth, elastic ball.
This usually takes about 8 to 10 minutes of consistent pushing, folding, and turning. You’ll feel the change under your hands as the dough becomes less sticky and more resilient. Proper kneading is what builds the strength for a crust that can support toppings without becoming dense.
Patience and Proofing
After kneading, the dough needs to rest and rise, a process called proofing. During this time, the yeast gets to work, consuming the sugars in the flour and releasing carbon dioxide gas. These gas bubbles are what create a light, airy crumb in the finished crust.
For the best flavor, a slow, cool rise is often preferred, but a warm spot in your kitchen will get the job done in about an hour or two. The dough should double in size. This fermentation period is not just for volume; it also develops complex flavors in the dough, making your crust taste amazing all on its own.
Crafting a Gourmet Pizza Experience at Home
Once you have a handle on making fantastic dough, you open the door to creating a gourmet pizza experience right in your own kitchen. You are no longer limited to standard delivery options. Instead, you can experiment with fresh, high-quality ingredients that you might find at a specialty pizzeria.
This is your chance to get creative. Think beyond pepperoni and mushrooms. Consider combinations like prosciutto with fig and arugula, or pear with gorgonzola and walnuts. A great crust supports these sophisticated flavors, turning a simple meal into something truly special. Your homemade gourmet pizza will easily outshine anything you can get in a box.
Choosing Your Toppings
When building a gourmet pizza, remember that less is often more. A perfect crust should not be overloaded. Choose three to four complementary toppings that will shine. Start with a quality base, whether it is a simple San Marzano tomato sauce, a garlic-infused olive oil, or a creamy pesto.
Next, select your cheese. Fresh mozzarella is a classic choice for its milky flavor and beautiful melt. Then, add your main ingredients. Distribute them evenly, leaving a little space so the pizza does not become watery during baking. A final drizzle of olive oil or a sprinkle of fresh herbs after baking adds a professional touch.
The Role of Flour in Your Crust
The type of flour you choose directly affects the final texture of your crust. As mentioned, bread flour is a great option for its high protein content, which creates a chewier crust. All-purpose flour will give you a slightly softer result.
For those wanting to dig deeper, “00” flour, a finely milled Italian flour, produces a very delicate and crisp crust, typical of Neapolitan-style pizza. Experimenting with different types of flour can be a fun way to discover your personal preference. Each one interacts with water and yeast differently, giving you a new experience with every batch.
The Final Steps to a Perfect Crust Pizza
You have made and proofed your dough, and you have chosen your toppings. Now comes the final, exciting part: assembling and baking. How you handle the dough at this stage is crucial for achieving that signature crispy bottom and airy edge.
The goal is to work quickly and confidently. Overworking the dough now can deflate the air pockets you so patiently created during proofing. A hot oven is also non-negotiable. The intense heat is what creates “oven spring,” the rapid puffing of the crust that results in a light, open texture.
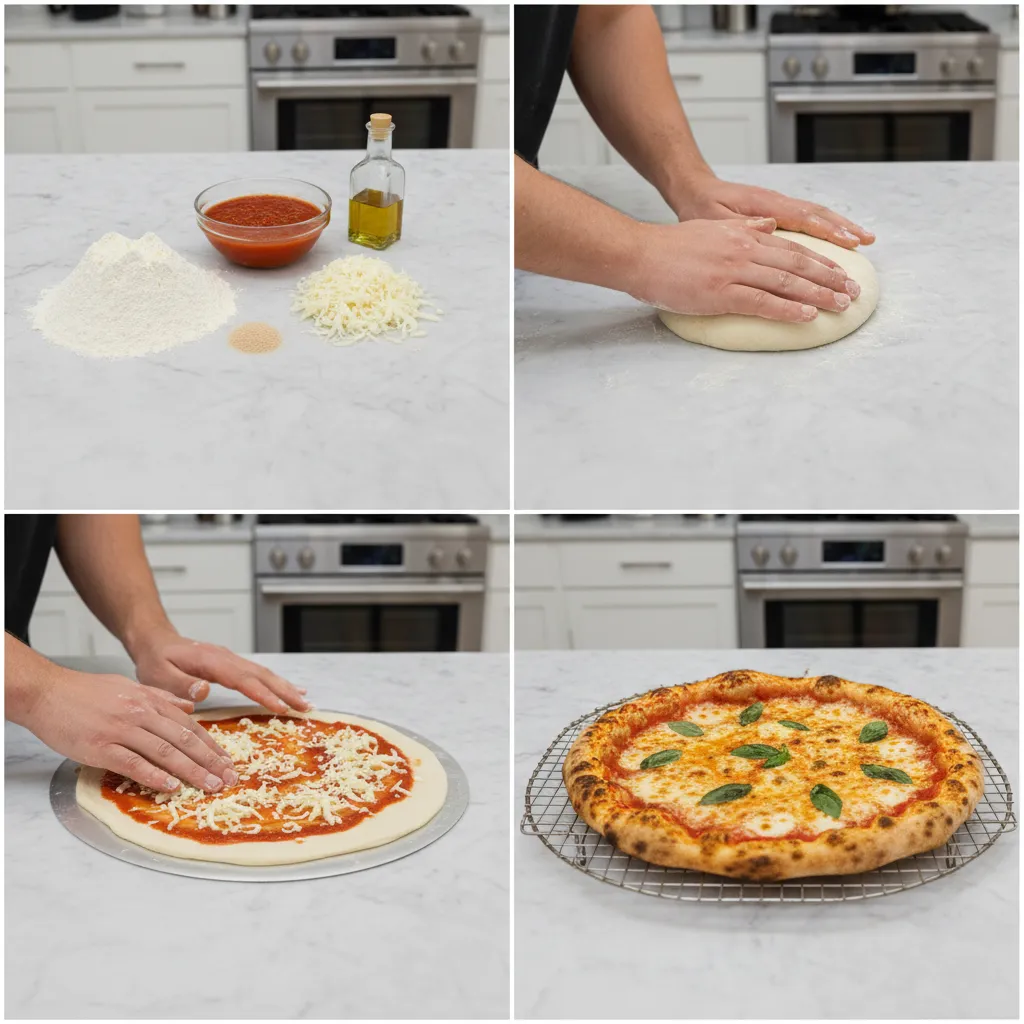
Assembling Your Masterpiece
Start by gently pressing your proofed dough ball into a flat circle on a lightly floured surface. Use your fingertips to press from the center outwards, leaving a slightly thicker rim for the edge crust. Avoid using a rolling pin if you can, as it can compress the dough and eliminate air bubbles.
Once you have your desired shape, transfer the dough to a pizza peel dusted with cornmeal or a piece of parchment paper. The cornmeal acts like little ball bearings, helping the pizza slide easily into the oven. Now, add your sauce, cheese, and toppings. Work from the center out, and remember not to overload it.
Baking for Maximum Crispiness
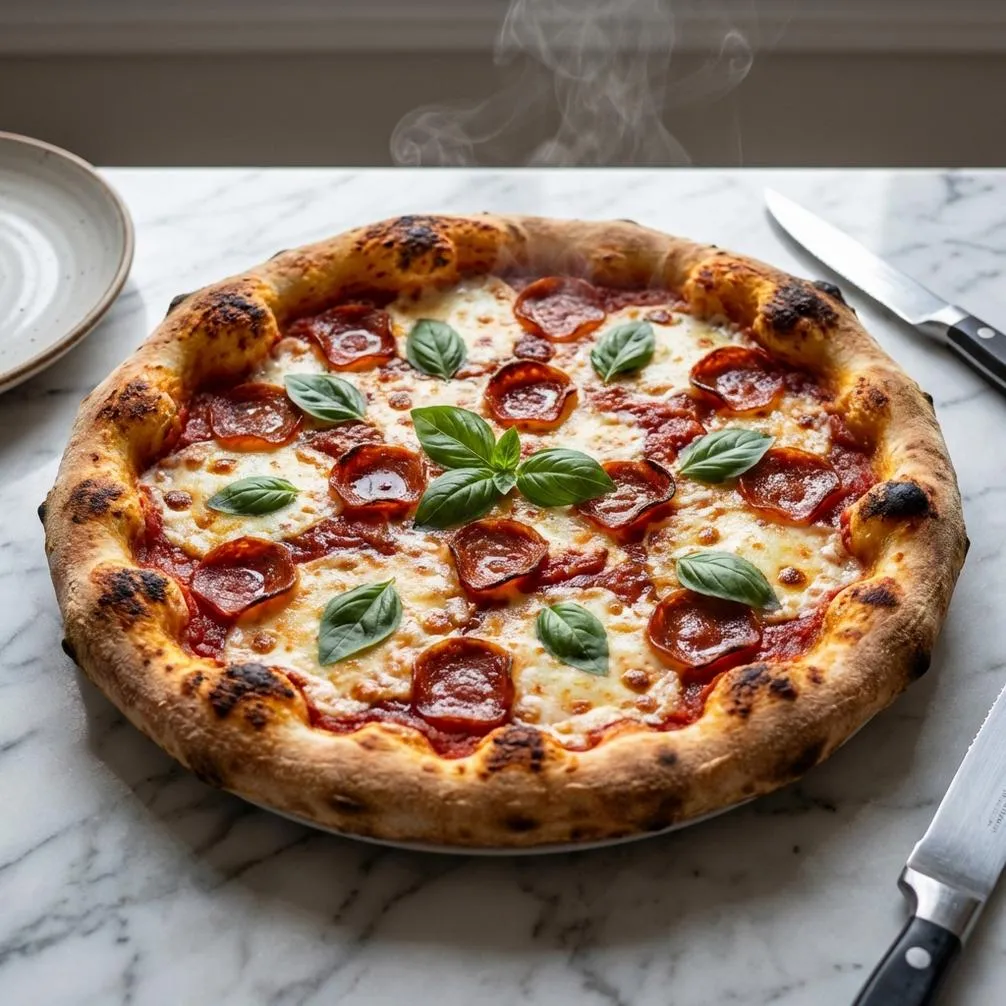
For the crispiest crust, preheat your oven to its highest setting, typically between 500-550°F (260-290°C), with a pizza stone or steel inside for at least 45 minutes. The stored heat in the stone is the secret to a perfectly browned and crispy bottom.
Carefully slide your assembled pizza onto the hot stone. The intense, direct heat will immediately begin to cook the bottom of The Crust Pizza, preventing any sogginess. Bake for 8-12 minutes, or until the cheese is bubbly and the crust is a deep golden brown. Let it rest for a minute before slicing and serving.
The Crust Pizza Recipe
This recipe gives you the blueprint for a perfect pizza night. Follow these steps to create a crust that is crispy, chewy, and full of flavor.
Secret to the best The Crust Pizza in 5 Steps
Ingredients
- 3.5 cups ’00’ or Bread Flour plus more for dusting
- 2 tsp instant yeast
- 2 tsp granulated sugar
- 1.5 tsp fine sea salt
- 1.33 cups warm water about 110°F or 43°C
- 2 tbsp extra virgin olive oil plus more for drizzling
- 1 cup pizza sauce your favorite brand or homemade
- 8 oz fresh mozzarella cheese patted dry and sliced or torn
- 0.25 cup fresh basil leaves for garnish
Instructions
- Step 1: Make and Rise the Dough. In a large bowl or the bowl of a stand mixer, whisk together the flour, instant yeast, sugar, and salt. Add the warm water and 2 tbsp olive oil. Mix until a shaggy dough forms. Knead for 5-7 minutes by hand on a floured surface (or with the dough hook on medium speed) until the dough is smooth and elastic. Form into a ball, place in a lightly oiled bowl, cover, and let rise in a warm place for 1-2 hours, or until doubled in size.
- Step 2: The Secret – Preheat Oven & Stone. At least 45 minutes before you plan to bake, place a pizza stone or baking steel on a middle rack in your oven. Preheat the oven to its highest temperature, typically 500-550°F (260-290°C). Allowing the stone to get extremely hot is the key to a crispy, leopard-spotted crust.
- Step 3: Shape the Crust. Once the dough has risen, gently punch it down and divide it into two equal balls. On a lightly floured surface, gently press and stretch one ball of dough into a 12-inch round. Avoid overworking it. For a thinner center and puffier crust, use your fingertips to press from the center outwards, leaving the outer edge thicker.
- Step 4: Assemble the Pizza. Lightly dust a pizza peel or the back of a baking sheet with flour or cornmeal. Carefully transfer your shaped dough onto the peel. Working quickly, spread a thin layer of pizza sauce over the dough, leaving a 1-inch border. Arrange the fresh mozzarella evenly on top. Drizzle lightly with olive oil.
- Step 5: Bake to Perfection. Gently shake the peel to ensure the pizza is not sticking. Carefully slide the pizza from the peel onto the preheated pizza stone in the oven. Bake for 10-14 minutes, or until the crust is golden brown and the cheese is melted and bubbly. Remove from the oven, top with fresh basil leaves, let it rest for a minute, then slice and serve. Repeat for the second pizza.
Notes
Topping Tip: Less is more. Overloading the pizza will result in a soggy crust.
Storage: Leftover pizza can be stored in an airtight container in the refrigerator for up to 3 days. Reheat in a hot skillet or oven for best results. Unused dough can be refrigerated for 2-3 days or frozen for up to 3 months.
Frequently Asked Questions About The Crust Pizza
What makes a pizza crust crispy on the bottom and chewy on the inside?
The combination of high oven heat and a preheated baking surface, like a pizza stone or steel, is key for a crispy bottom. The intense heat cooks the dough quickly from below. The chewy interior comes from well-developed gluten, which is created by using bread flour and kneading the dough properly.
Can I make The Crust Pizza dough ahead of time?
Absolutely. Making the dough ahead of time actually improves its flavor. After the first rise, you can store the dough in an airtight container in the refrigerator for up to three days. Just let it sit at room temperature for about an hour before you plan to shape and bake it.
What type of flour is best for The Crust Pizza?
Bread flour is highly recommended for this recipe because its higher protein content helps create a stronger gluten network, resulting in a chewier crust. However, all-purpose flour will also work well and will produce a slightly softer, more tender crust.
Do I need a pizza stone for this recipe?
A pizza stone or pizza steel is strongly recommended for the best results, as it gets extremely hot and cooks the bottom of the crust very quickly. If you do not have one, you can get a good result by preheating a heavy-duty, rimless baking sheet in the oven and baking your pizza on that instead.
Conclusion
Creating an amazing homemade pizza is a deeply rewarding process, and it all starts with The Crust Pizza. By focusing on a few simple techniques—proper kneading, patient proofing, and high-heat baking—you can make a crust that rivals your favorite pizzeria. This recipe is more than just a set of instructions; it is an invitation to bring the family together, get your hands a little floury, and make something truly delicious. So preheat your oven, gather your favorite toppings, and get ready to enjoy the best pizza you have ever made right at home.


Comments and Reviews