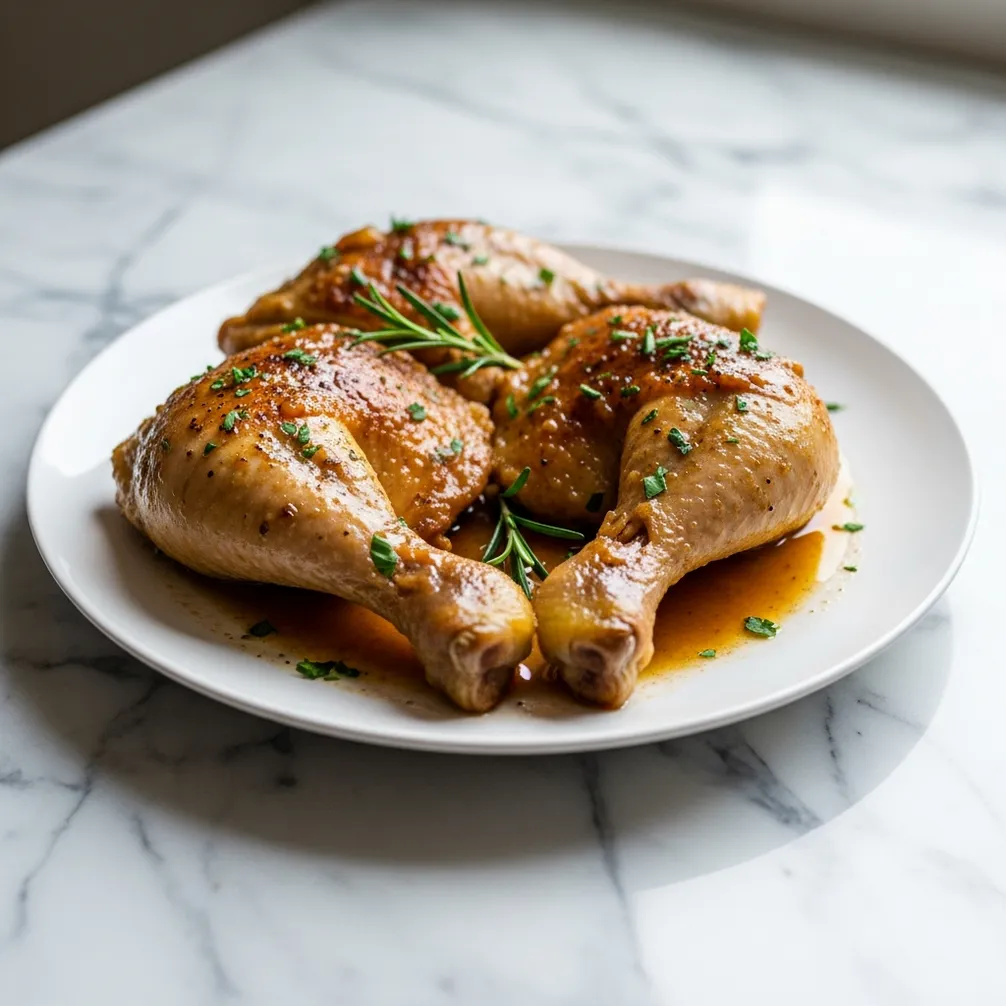
Growing up, the signal for a truly special Sunday was the smell of chicken frying in a cast-iron skillet. It was my grandmother’s signature dish, and to me, it was the absolute best fried chicken in the world. The whole family would gather, drawn in by the incredible aroma.
That crispy, golden skin giving way to unbelievably juicy meat is a memory I cherish. For years, I tried to replicate it, and after much trial and error, I finally figured out the secrets. This isn’t just any recipe; this is the culmination of those memories. I’m so excited to share my method for making the best fried chicken you’ve ever had, right in your own kitchen. It’s a taste of my family’s tradition, made simple for yours.
The Foundation of the Best Fried Chicken
Before you even think about the fryer, the journey to the best fried chicken begins with proper preparation. These first two steps are non-negotiable for achieving that tender, flavorful meat that defines a truly great piece of fried chicken. Many people skip these, but I promise they make all the difference. Just like with other family-favorite main courses, such as this creamy garlic shrimp recipe, a little prep goes a long way.
Secret #1: The All-Important Brine
First, let’s talk about the brine. Soaking your chicken in a saltwater solution is the most effective way to get juicy, seasoned meat through and through. The salt works its way deep into the chicken, not only adding flavor but also helping the meat retain moisture during the hot frying process. This means your chicken won’t dry out. My brine is simple: just water, salt, and a little sugar to balance the flavor and help with browning. You can also add aromatics like garlic, peppercorns, and bay leaves. A good four to six hours in the brine is perfect. Any less, and you won’t get the full effect; any more, and the chicken can become too salty.
Secret #2: Choosing the Right Chicken
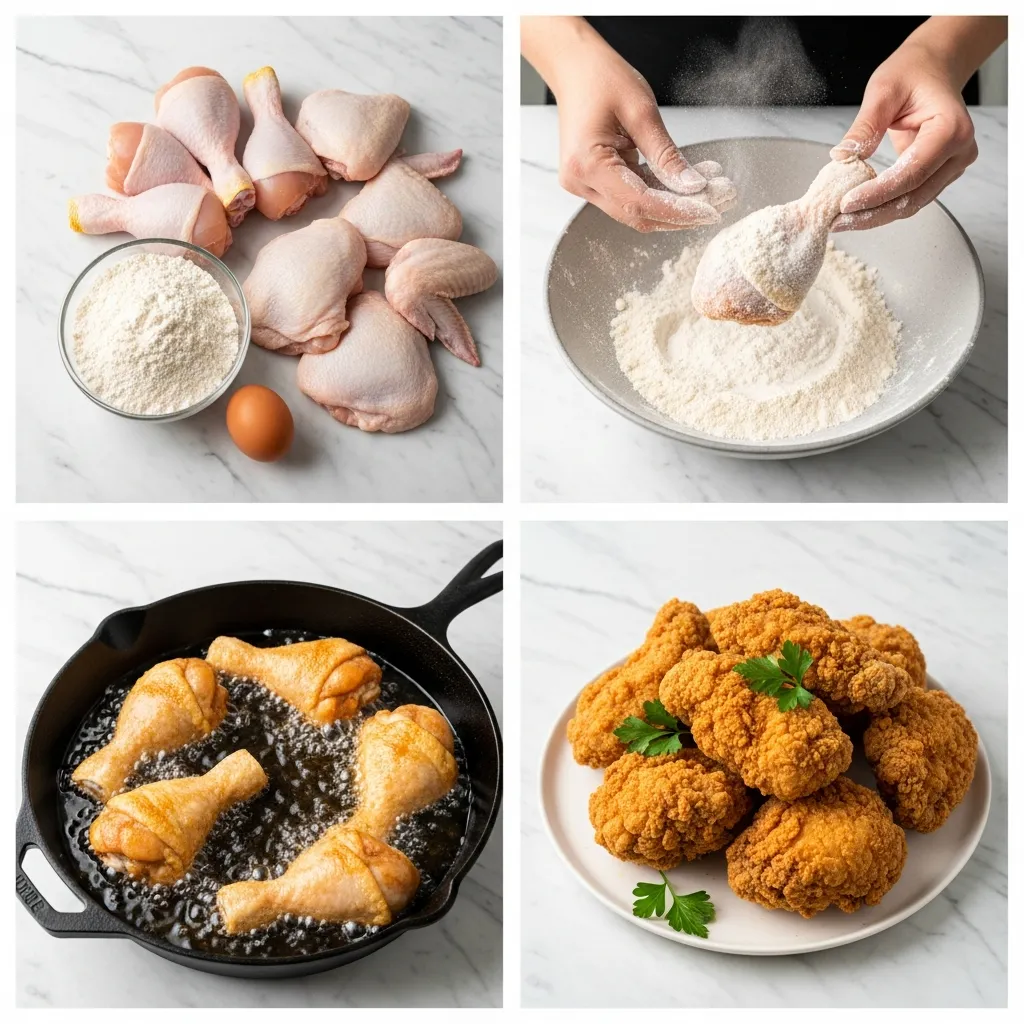
Next, you need to start with the right raw material. For the best fried chicken, always choose bone-in, skin-on pieces. The bone helps conduct heat evenly through the meat, which results in more even cooking. More importantly, it adds a tremendous amount of flavor. The skin is just as vital because it crisps up to create that crunchy exterior we all crave. I prefer to buy a whole chicken and break it down myself. This way, I get a mix of breasts, thighs, drumsticks, and wings. If you’re short on time, buying a pack of your favorite pre-cut pieces works just as well. Just make sure they are similar in size so they cook at about the same rate.
Building the Perfect Crispy Crust
With your chicken brined and ready, the next stage is creating the coating. This is where that signature crunch comes from. A lackluster crust can ruin even the most perfectly cooked chicken, so we will pay special attention to this step. The goal is a light, craggy coating that sticks to the chicken and turns a beautiful golden brown.
Secret #3: The Double Dredge Technique
The secret to a substantial, crispy crust that doesn’t fall off is the double dredge. This simply means coating the chicken in flour, then an egg wash, and then back into the flour again. The first flour coating gives the egg wash something to cling to. Then, the egg wash acts as a glue for the final, thick layer of seasoned flour. When you do this, press the flour firmly onto the chicken each time. After the final dredge, let the coated chicken rest on a wire rack for about 15 minutes. This small step allows the coating to hydrate and adhere to the skin, making it less likely to slide off in the hot oil.
Secret #4: Seasoning Every Layer
Bland fried chicken is a huge disappointment. To avoid this, you must season every single component. We already seasoned the chicken itself with the brine. Now, you need to generously season the flour mixture. Don’t be shy here! I use a classic blend of salt, black pepper, paprika, garlic powder, and a pinch of cayenne for a little warmth. This seasoned flour is the primary source of the crust’s flavor. You should also lightly season your egg wash with a pinch of salt and pepper. By seasoning at every stage, you build layers of flavor that make each bite of your best fried chicken absolutely delicious.
Mastering the Fry for a Crispy Chicken Recipe
You have perfectly prepped and coated chicken; now it’s time for the main event. How you fry the chicken is just as important as how you prepare it. This is where your delicious coating transforms into that crunchy, golden-brown perfection. Following a few key rules will give you a fantastic crispy chicken recipe result every single time, without any sogginess. And once you’ve made this incredible main course, you’ll need something sweet to finish the meal. You can find some amazing desserts and treats that pair wonderfully with a savory dinner.
Secret #5: The Right Oil and Temperature
First, choose the right cooking oil. You need an oil with a high smoke point, meaning it can get very hot without burning and smoking. Peanut oil is the traditional choice for its high smoke point and neutral flavor. Canola, vegetable, or shortening also work well. Next, temperature is everything. The ideal temperature for frying chicken is between 325°F and 350°F. If the oil is too cool, the chicken will absorb too much oil and become greasy. If it’s too hot, the crust will burn before the meat is cooked through. I strongly recommend using a deep-fry or candy thermometer to monitor the oil’s temperature. It’s a small investment that takes the guesswork out of frying.
Secret #6: Don’t Crowd the Pan
This might be the most common mistake people make. It is tempting to fill the skillet with as much chicken as possible to finish the job faster, but this is a recipe for disaster. Adding too much chicken at once drastically lowers the oil’s temperature. When the temperature drops, the chicken begins to steam instead of fry. This results in a soggy, greasy crust. Instead, fry your chicken in batches, leaving plenty of space around each piece. This keeps the oil hot and allows the crust to become wonderfully crisp. It might take a little longer, but the reward is a truly excellent crispy chicken recipe.
The Finishing Touches for Your Fried Chicken
You pulled the beautifully browned chicken from the hot oil, but your job isn’t quite done. The moments immediately after frying are crucial for preserving that perfect texture you worked so hard to create. One wrong move can turn your crispy masterpiece into a steamy, soft letdown.
Secret #7: The Cooling Rack is Your Best Friend
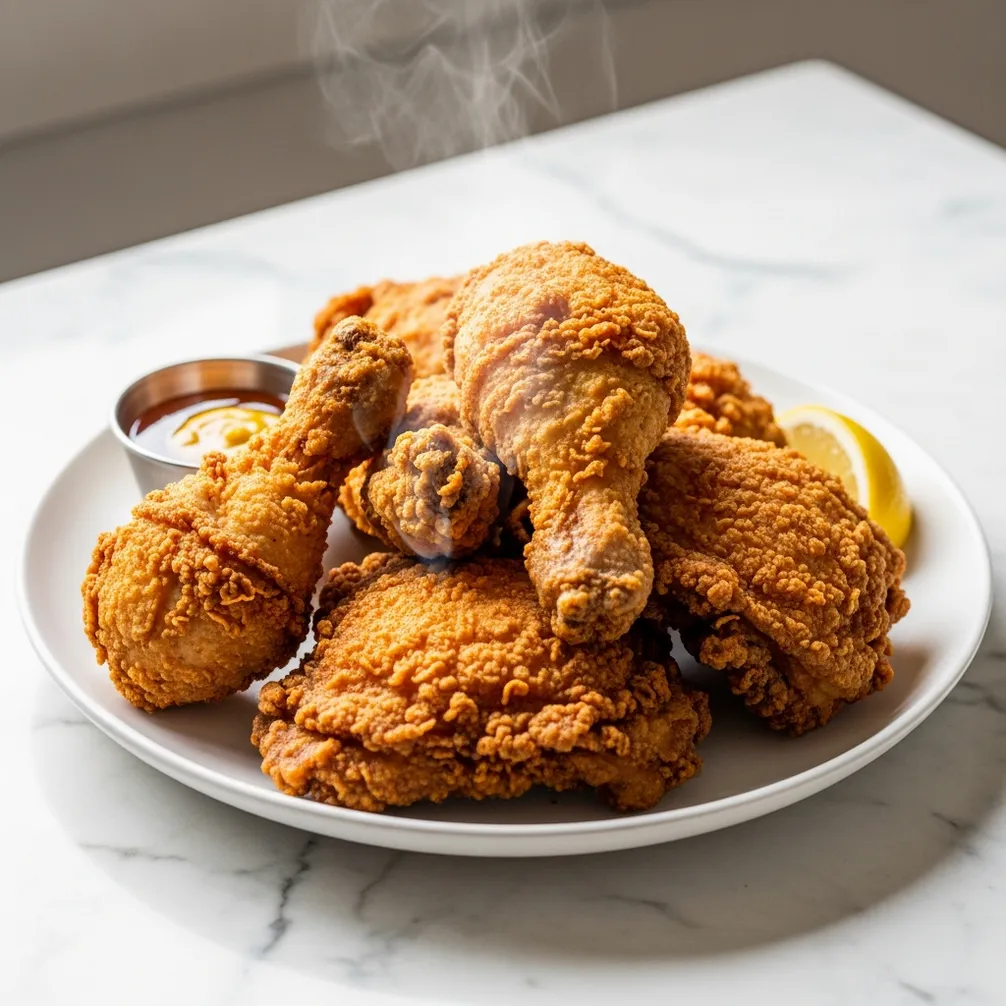
Once a piece of chicken is perfectly cooked, immediately transfer it to a wire cooling rack set over a baking sheet. Whatever you do, do not place it on a plate lined with paper towels. While paper towels do absorb some surface grease, they also trap steam underneath the chicken. This steam will instantly begin to soften that beautiful, crunchy crust. A wire rack allows air to circulate all around the chicken, keeping the bottom just as crispy as the top. As a final touch, I like to sprinkle the hot chicken with just a tiny bit of extra salt right as it comes out of the fryer.
Serving and Storing Your Masterpiece
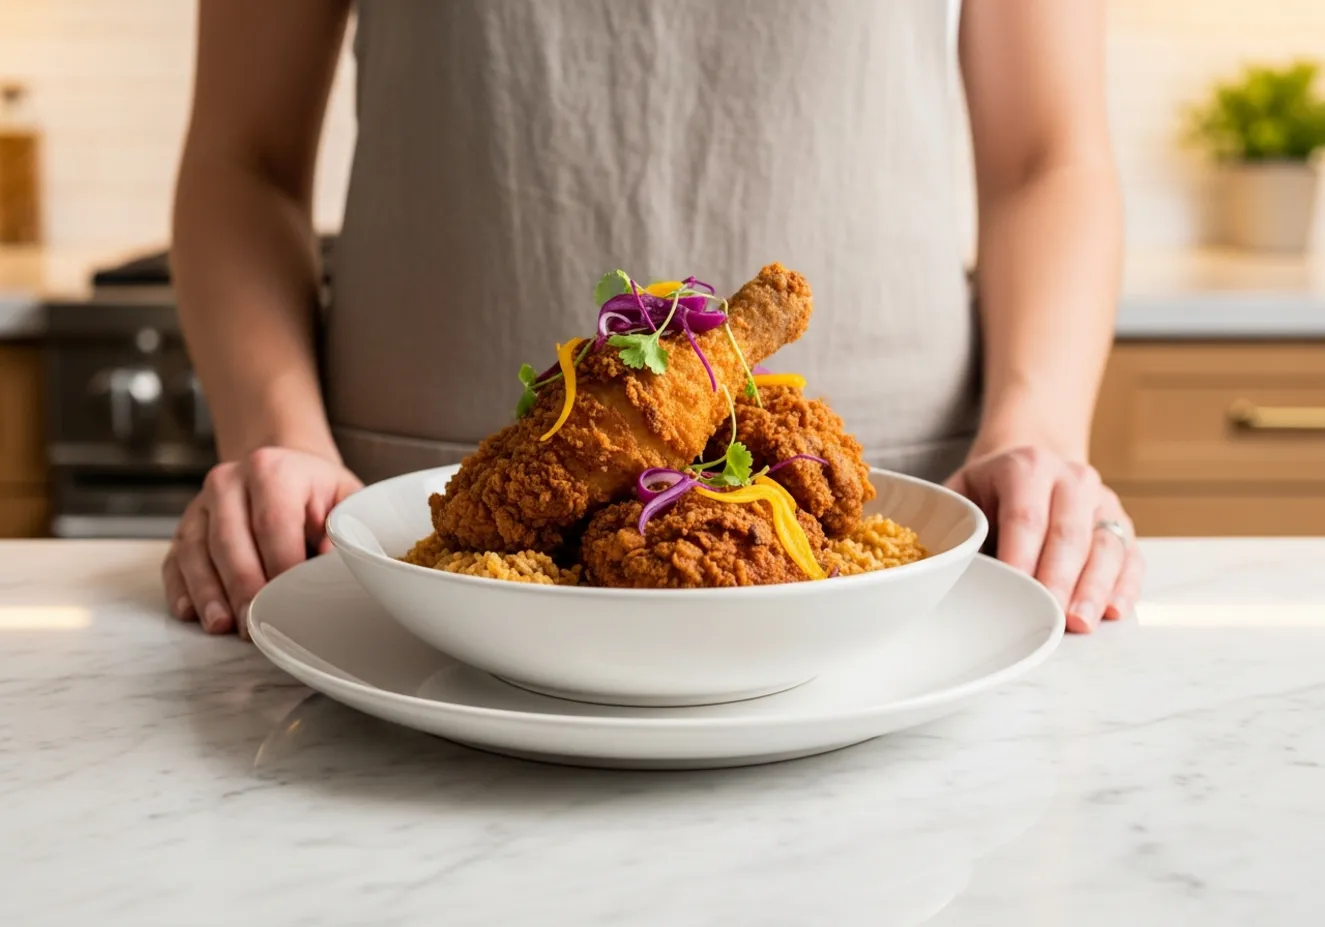
Now, you are ready to enjoy the best fried chicken of your life. Serve it hot with your favorite sides. Mashed potatoes, coleslaw, biscuits, or a simple green salad are all classic pairings. But what if you have leftovers? The best way to store fried chicken is in the refrigerator in a container that is not completely airtight. You can leave the lid slightly ajar or cover it loosely with foil. This helps prevent condensation from making the crust soggy. To reheat, place the chicken on a wire rack on a baking sheet and bake it in a 375°F oven for about 15-20 minutes, or until it’s heated through and the skin is crisp again. Avoid the microwave at all costs!
Get the Best Fried Chicken Recipe
Now you have all my secrets for making unbelievably good fried chicken at home. Follow the steps, and you’re on your way to a meal your family will talk about for weeks.
Easy recipe for Best Fried Chicken: 7 Secrets
Ingredients
- 3-4 lbs bone-in, skin-on chicken pieces (about 8 pieces, e.g., 2 breasts, 2 thighs, 2 drumsticks, 2 wings)
- 2 cups buttermilk (Secret 1: for tenderizing)
- 1 tbsp hot sauce (optional, for buttermilk soak)
- 2 cups all-purpose flour
- ¼ cup cornstarch (Secret 2: for extra crispiness)
- 1 tbsp baking powder (Secret 2: for a lighter, crispier coating)
- 2 tsp salt (Secret 6: important for flavor)
- 1 tsp black pepper (Secret 6)
- 1 tsp paprika (Secret 6)
- ½ tsp garlic powder (Secret 6)
- ½ tsp onion powder (Secret 6)
- ¼ tsp cayenne pepper (optional, for a kick, Secret 6)
- 4-6 cups vegetable oil, peanut oil, or shortening (for frying, choose high smoke point oil)
Instructions
- Secret 1: The Buttermilk Soak. In a large bowl, combine the buttermilk and hot sauce (if using). Add the chicken pieces, ensuring they are fully submerged. Cover and refrigerate for at least 2 hours, or preferably overnight, to tenderize the meat and infuse flavor.
- When ready to fry, remove the chicken from the refrigerator and let it sit at room temperature for about 30 minutes. Meanwhile, prepare your dredging station. In a shallow dish, whisk together the flour, cornstarch, baking powder, salt, black pepper, paprika, garlic powder, onion powder, and cayenne pepper (if using). This is Secret 2: The Right Coating Mix – the cornstarch and baking powder are key for ultra-crispy results!
- Remove chicken pieces from the buttermilk, letting excess drip off slightly. Dredge each piece thoroughly in the flour mixture, pressing firmly to ensure the coating adheres well. Shake off any excess. Place the coated chicken on a wire rack set over a baking sheet. Let it rest for at least 10-15 minutes; this helps the coating stick better during frying.
- In a heavy-bottomed pot or Dutch oven (Secret 7: Use a Heavy-Bottomed Pot for consistent heat), pour enough oil to reach a depth of about 2-3 inches. Heat the oil over medium-high heat until it reaches 350°F (175°C) on a deep-fry thermometer. This is Secret 3: The Proper Oil Temperature – crucial for crispiness without greasiness. It’s often best to start a bit higher as the chicken will lower the temperature.
- Carefully lower 2-3 pieces of chicken into the hot oil using tongs. Secret 4: Don’t Crowd the Pan – frying in batches is essential to maintain oil temperature and ensure even cooking. Fry for about 6-8 minutes per side, turning occasionally, until golden brown and cooked through. Larger pieces like breasts and thighs will take longer than wings and drumsticks. The internal temperature should reach 165°F (74°C).
- Once cooked, remove the chicken from the oil and place it on a clean wire rack set over a baking sheet to drain excess oil. Do not place it directly on paper towels initially, as this can make the bottom soggy. Repeat with remaining chicken pieces, ensuring the oil returns to 350°F (175°C) before adding the next batch.
- Secret 5: Rest the Chicken. Let the fried chicken rest for 5-10 minutes before serving. This allows the juices to redistribute, resulting in incredibly moist and tender meat.
Notes
Frequently Asked Questions
What is the secret to extra crispy fried chicken?
The main secret lies in a two-part process: the coating and the cooking. Use a double dredge (flour, then egg, then flour again) to build a substantial crust. Adding a bit of cornstarch to your flour mixture also contributes to a lighter, crispier texture. Finally, make sure your oil is at the correct temperature (325-350°F) so the crust fries to a crisp instead of soaking up oil.
What kind of oil is best for frying chicken?
The best oils for frying chicken have a high smoke point and a neutral flavor. Peanut oil is a classic choice for its ability to withstand high heat without burning. Other great options include canola oil, vegetable oil, and shortening. Avoid oils with low smoke points, like extra virgin olive oil, as they will burn and give the chicken an unpleasant taste.
Should you cover fried chicken after frying?
No, you should never cover hot fried chicken. Covering it traps steam, which will immediately begin to soften the crispy crust you worked hard to achieve. The best practice is to place the cooked chicken on a wire rack to cool, allowing air to circulate freely and keep the coating crunchy.
How do you know when fried chicken is done?
The most reliable way to tell if fried chicken is done is by using an instant-read meat thermometer. Chicken is safely cooked when its internal temperature reaches 165°F. For dark meat like thighs and drumsticks, you might prefer to cook them to 175-180°F for a more tender texture. Visually, the juices should run clear when the meat is pierced.
A Tradition Worth Making
Making the best fried chicken isn’t just about following steps; it’s about creating a moment. It’s the centerpiece of a meal that brings people together and makes any day feel special. This recipe is more than just food; it’s a piece of my heart and my family’s history, adapted for your modern kitchen. I hope it brings as much joy and as many happy memories to your table as it has to mine.